How to Replace a Chainsaw Chain: Your Comprehensive Guide
Replacing a chainsaw chain may seem daunting, but it is essential for maintaining your tool’s efficiency and performance. Did you know that a worn saw chain can significantly reduce cutting speed and even cause accidents? This guide will cover the fundamentals of chainsaw chains, the necessary tools for replacement, and step-by-step instructions for removing the old chain and installing a new one. By the end, readers will learn how to ensure their chainsaw runs smoothly, enhancing safety and cutting capability while saving time and money on professional repairs.
Key Takeaways
- Regularly check the chainsaw chain for reduced performance or visible damage to ensure safety
- Select the correct replacement chain by confirming specifications like bar length, pitch, and gauge
- Ensure personal safety by wearing protective gear and preparing a safe workspace before replacement
- Proper lubrication and routine inspections extend the lifespan and efficiency of the chainsaw chain
- Adjusting chain tension correctly is crucial for optimal performance and prevents potential hazards during use
Understanding Chainsaw Chain Basics
Recognising when it’s time to replace a chainsaw chain is essential for effective and safe operation. This section will cover how to identify wear on the chain, select the correct chainsaw replacement bar, and understand the importance of compatibility with the sprocket. Additionally, necessary safety measures will be outlined to ensure a secure replacement process.
Recognising When It's Time to Replace the Chain
One of the most noticeable signs that a chainsaw chain needs replacing is reduced cutting performance. When the chain struggles to cut through wood, even with adequate force, it may indicate significant wear on the teeth. Regular maintenance checks can help gardeners determine if the chain has become dull and requires replacement for effective operation.
Another crucial indicator is the presence of visible damage such as cracks or breaks in the links. A damaged chain can pose serious safety risks, making it essential to inspect it closely before use. If any unconventional sounds or vibrations occur during operation, this could also signal wear or damage that necessitates a new chainsaw chain.
Finally, understanding the manufacturer’s recommendations for chain life can guide users in deciding when to replace their chainsaw chain. Various elements, including frequency of use and type of wood cut, can affect chain longevity. By staying informed about these factors, gardeners can ensure they maintain their tools effectively, keeping safety and efficiency a top priority.
Choosing the Right Replacement Chain
Choosing the right replacement chain for a chainsaw involves understanding the specifications of the saw itself. Users must check the bar length, pitch, and gauge of the current chain, as these factors directly influence compatibility. For instance, a chainsaw with a 14-inch bar may require a different chain than one with a 20-inch bar, even if both saws are from the same brand.
Gardeners should also consider the type of cutting they plan to do when selecting a replacement chain. Different chains are designed for specific tasks, such as ripping, cross-cutting, or pruning. For example, a low-profile chain may be more suitable for occasional users needing a safety edge, while professional landscapers might prefer a more aggressive chain for heavy-duty cutting tasks.
Additionally, it is advisable to consult the chainsaw manufacturer’s guidelines or user manuals to find the ideal replacement chain. Many manufacturers offer specific models that fit their chainsaws, which can eliminate confusion and ensure safety. Knowing the correct chain type can enhance performance and extend the life of the chainsaw, making it easier for users to tackle various gardening projects efficiently.
Safety Measures Before Starting the Replacement
Before replacing a chainsaw chain, ensuring personal safety is paramount. Gardeners should begin by wearing appropriate protective gear, including safety goggles, gloves, and sturdy footwear. This equipment will help prevent injuries from debris or accidental slips during the replacement process.
Additionally, it is essential to prepare the workspace adequately. The area should be clear of obstacles, and the chainsaw should be placed on a stable surface for secure handling. Checking that the chainsaw is turned off and disconnected from any power source, if applicable, will help prevent any accidental start-ups during the chain replacement.
Lastly, understanding the tools required for the replacement is crucial. Necessary tools typically include a screwdriver, socket wrench, or a combination tool specific to the model of the chainsaw. Familiarising oneself with these tools and ensuring they are readily available can streamline the replacement process and enhance safety overall:
| Safety Measure | Description |
|---|---|
| Protective Gear | Wear safety goggles, gloves, and sturdy footwear. |
| Workspace Setup | Ensure the area is clear and chainsaw is stable and turned off. |
| Required Tools | Have necessary tools like screwdrivers and wrenches ready. |
Tools Required for Replacing a Chainsaw Chain
Replacing a chainsaw chain requires specific tools and equipment to ensure a smooth process. Essential tools, such as screwdrivers and wrenches, facilitate securing the new chain. Preparing the work area by clearing obstacles enhances safety and efficiency. Optional tools can simplify the replacement, making the task easier for both novice and experienced gardeners.
Essential Tools and Equipment
When replacing a chainsaw chain, having the right tools on hand is essential for a successful process. Basic tools include a socket wrench or combination wrench, which are necessary for loosening nuts and bolts securing the chain. A screwdriver is also required to adjust any tension settings to ensure optimal performance after installation, making the chainsaw safer and more effective during use.
In addition to the basic tools, a chainsaw file can be invaluable for maintaining the sharpness of the chain. Regularly sharpening the chain can extend its life and improve cutting efficiency, which is particularly important for gardeners looking to maximise their productivity. Having this tool handy not only aids in the installation of a new chain but also ensures ongoing maintenance is carried out effectively.
Safety equipment is another critical aspect of preparation. Personal protective gear such as safety goggles and gloves provides invaluable protection during the process. Using these items reduces the risk of injury from debris or accidental slips, making it a priority for anyone involved in chainsaw maintenance. This focus on safety is crucial for ensuring a secure working environment and preventing potential accidents while replacing a chainsaw chain.
Preparing Your Work Area
Preparing the work area is fundamental when replacing a chainsaw chain. Gardeners should ensure that the workspace is clear and free of any obstacles that might interfere with the replacement process. This can help prevent accidents and allow for easy access to tools and equipment needed for the job.
Setting up a stable surface is equally important. The chainsaw should be placed on a flat, sturdy table or workbench to prevent it from tipping over while performing maintenance. A well-organised area helps keep tools within reach and maintains focus, reducing the chances of errors during the chain replacement process.
Finally, it is advisable to have proper lighting in the workspace. Adequate illumination enables gardeners to see clearly, making it easier to inspect the chainsaw and ensure all parts are in good condition before and after replacement. Prioritising these preparations can significantly enhance both safety and efficiency during the chain replacement task:
| Preparation Step | Description |
|---|---|
| Clear Workspace | Ensure the area is free of obstacles to prevent accidents. |
| Stable Surface | Place the chainsaw on a sturdy table to avoid tipping. |
| Proper Lighting | Ensure adequate illumination for visibility during maintenance. |
Optional Tools for Ease of Replacement
Optional tools can significantly enhance the ease of replacing a chainsaw chain. A chain tension gauge, for instance, allows gardeners to ensure the chain is correctly adjusted after installation. This tool helps prevent issues associated with incorrect tension, such as decreased cutting efficiency or increased wear on the chain, leading to a more effective gardening experience.
A chainsaw scrench, which combines a wrench and screwdriver, is another handy tool for this task. This multi-functional instrument makes it easier to adjust bolts and screws without needing multiple separate tools. Gardeners appreciate the convenience it offers, especially when working in challenging conditions or tight spaces.
Lastly, a bar and chain oil container can streamline the maintenance process after replacing the chain. Keeping the chain well-lubricated is vital for its longevity and performance. A dedicated container allows gardeners to easily apply oil, ensuring the chain operates smoothly and reduces friction during use, ultimately enhancing the overall cutting experience.
Removing the Old Chainsaw Chain
To begin the process of replacing a chainsaw chain, it is essential to follow a systematic approach. Start by disconnecting the chainsaw from any power sources to ensure safety. Next, loosen the chain tension to relieve any stress on the chain. Detach the side plate or cover, allowing access to the chain before carefully removing the old chain. Each of these steps is crucial for a safe and efficient replacement process.
Disconnecting the Chainsaw From Power Sources
Before attempting to remove the old chainsaw chain, it is vital to disconnect the chainsaw from its power source. For electric chainsaws, this means unplugging the unit to eliminate any risk of accidental startup. For battery-operated models, ensure that the battery pack is removed entirely. This step is not only essential for safety but also helps prevent any unintended injuries during the replacement process.
In the case of petrol chainsaws, users must take extra precautions by turning off the engine and allowing it to cool down fully. Fuel-powered chainsaws may pose additional hazards, particularly if they are still warm or if fuel is leaking. Always check that the chainsaw is completely shut down and that there is no chance of it starting accidentally while the old chain is being removed.
Taking the time to disconnect the chainsaw from power sources helps create a safe working environment. By ensuring that no power is supplied to the chainsaw, users can focus on effectively removing the old chain without the fear of unexpected movements or operations. This proactive approach serves to enhance overall safety during the maintenance process and contributes to a smoother chain replacement experience.
Loosening the Chain Tension
Loosening the chain tension is a necessary step before removing a chainsaw chain. This process helps to reduce the strain on the chain, allowing for easier removal and preventing potential damage to the chainsaw components. Gardeners should refer to the specific user manual for their model to identify the correct adjustment mechanism, which is typically located on the side of the chainsaw.
To loosen the tension, users usually need to turn the tensioning screw counter-clockwise. This action decreases the tightness of the chain, ensuring that it can slide freely along the guide bar. Properly loosening the chain not only facilitates its removal but also eliminates excess force that could lead to injury during the process.
Once the tension has been adequately loosened, it becomes simple to detach the old chain from the guide bar and sprocket. This ease of removal enhances the overall efficiency of the chain replacement process, allowing gardeners to quickly and safely transition to installing a new chain. Addressing chain tension correctly is a key part of maintaining the chainsaw for optimal performance during gardening tasks.
Detaching the Side Plate or Cover
Detaching the side plate or cover is a crucial step in removing an old chainsaw chain. Gardeners should locate the screws or bolts that hold the side plate in place, as these secure the chain and bar assembly. Typically, using a socket wrench or screwdriver will allow easy access to these fasteners, enabling quick removal of the covering.
Once the screws are loosened, the side plate can be gently lifted away from the chainsaw to expose the chain and guide bar. At this point, it is essential to ensure that no debris or sawdust is caught in the mechanism, as this can affect the performance of the new chain. Keeping the area clean not only facilitates a smoother replacement process but also promotes better maintenance in the long run.
With the side plate or cover removed, the user can now access the old chainsaw chain for removal. This step provides an opportunity to inspect the guide bar for any signs of wear or damage that may need addressing before installing the new chain. A thorough inspection helps ensure that the new chain operates efficiently, ultimately enhancing the overall cutting performance of the chainsaw in future gardening tasks.
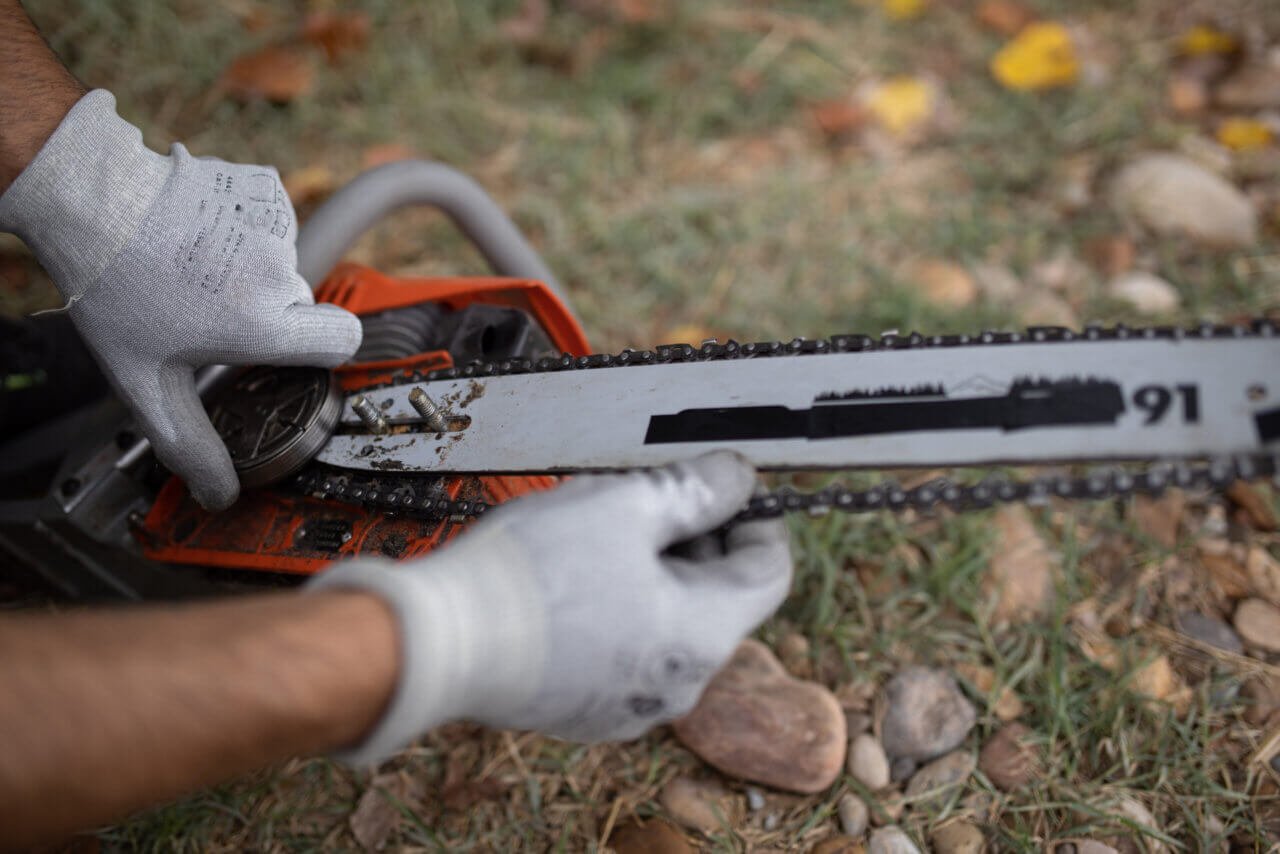
Carefully Removing the Old Chain
Carefully removing the old chainsaw chain is vital for ensuring a smooth replacement process. With the side plate already detached, users can gently lift the chain off the guide bar and sprocket. It is essential to maintain a firm grip, as the chain may still be under some tension from the bar, which could lead to unexpected movement during removal.
Once the chain is free from the guide bar, checking for any debris or damage to both the chain and guide bar is important. This inspection helps identify any issues that may hinder the performance of the new chain. Ensuring that the guide bar is clean and in good condition sets the stage for an effective installation of the replacement chain.
After removing the old chain, it is advisable to store it safely until it can be disposed of properly. Keeping the old chain secure prevents accidental injury. This step reflects the importance of safety and organisation when maintaining gardening tools, allowing users to focus on their outdoor projects with confidence.
Installing the New Chainsaw Chain
Installing the new chainsaw chain is a critical step to ensure optimal performance. This process includes carefully placing the new chain on the guide bar, ensuring the chain direction and alignment are correct, reattaching the side plate or cover, and adjusting the chain tension properly. Each of these steps is essential for safe and efficient chainsaw operation, enabling gardeners to maintain their tools effectively.
Placing the New Chain on the Guide Bar
Placing the new chainsaw chain on the guide bar is a straightforward task, but proper alignment is crucial for optimal cutting performance. Gardeners should first ensure that the chain is orientated correctly, with the sharp side of the teeth facing forward. This positioning allows for efficient cutting when the chainsaw is in operation, preventing unnecessary wear or damage.
Once the chain is aligned, it should be placed over the guide bar, ensuring that the links fit snugly into the groove. It’s important to glide the chain into the sprocket as well, allowing it to sit properly in place. Ensuring the chain is seated correctly can help prevent issues later, contributing to a smoother cutting experience in subsequent gardening tasks.
After placing the chain on the guide bar, attention should turn to reattaching the side plate or cover. This step secures the chain and guarantees that it remains in place during operation. Gardeners should double-check all connections to ensure everything is fitted correctly, ensuring both safety and performance when the chainsaw is back in use:
| Step | Description |
|---|---|
| Align the Chain | Ensure the sharp side of the teeth faces forward for effective cutting. |
| Place on Guide Bar | Fit the chain snugly in the groove and around the sprocket. |
| Secure the Side Plate | Reattach the side plate or cover to keep the chain in place. |
Ensuring Correct Chain Direction and Alignment
Ensuring the correct chain direction and alignment is critical for the effective operation of a chainsaw. The chain must be positioned so that the sharp teeth face forward, which allows for efficient cutting during use. Misalignment can not only hinder performance but may also lead to potential safety hazards, making it essential for users to double-check this aspect before finalising the installation.
To achieve proper alignment, the chain should be carefully fitted into the groove of the guide bar and seated correctly around the sprocket. Gardeners should take their time during this step, as a well-aligned chain reduces wear on both the chain and the saw, enhancing its lifespan. Ensuring the links sit snugly in the groove contributes to smoother operation, making gardening tasks more manageable and effective.
In addition, after installing the new chainsaw chain, it is advisable to rotate the chain by hand to ensure it moves freely along the guide bar. This simple check serves as an extra precaution, confirming that there are no areas of binding or misalignment that could cause issues when the chainsaw is in use. By prioritising correct chain direction and alignment, users set themselves up for a safer and more efficient gardening experience.
Reattaching the Side Plate or Cover
Reattaching the side plate or cover is a vital step in the process of installing a new chainsaw chain. After ensuring that the new chain is properly placed on the guide bar and sprocket, users should align the side plate with the corresponding holes and secure it using the appropriate screws or bolts. This assembly keeps the chain in position, preventing any accidental dislodgement during operation.
It is essential to tighten the screws carefully without over-torquing them, as this might cause damage to the cover or the chainsaw body. A well-secured side plate not only ensures the stability of the newly installed chain but also contributes to the overall safety of the tool while in use. Regularly checking and maintaining the tightness of these fasteners can lead to enhanced chainsaw performance over time.
Once the side plate or cover is reattached, gardeners should take a moment to inspect the assembly for alignment and fit. A quick visual check can reveal any gaps or misalignments that may lead to issues during operation. Ensuring everything is correctly in place allows users to feel confident in the functionality of their chainsaw, making it ready for effective gardening tasks.
Adjusting the Chain Tension Properly
Adjusting the chain tension properly is essential for the efficient operation of a chainsaw. A correctly tensioned chain ensures optimal cutting performance while preventing excessive wear or potential damage to the tool. Gardeners should aim for a tension where the chain sits snugly against the guide bar yet can still be easily pulled slightly away from the bar with minimal resistance.
To adjust the tension, users should refer to the chainsaw’s manual for specific instructions, as mechanisms can vary between models. Typically, this involves turning the tensioning screw clockwise to tighten or counter-clockwise to loosen the chain. Paying attention to the sound and feel of the chain while adjusting helps ensure it is neither too tight nor too loose, as both situations can lead to inefficient performance or safety hazards.
After the initial adjustment, it is advisable to run the chainsaw briefly to check how the chain moves during operation. Observing the chain’s behaviour can reveal whether further adjustments are necessary. This simple procedure can enhance cutting efficiency, boost safety, and extend the lifetime of the chainsaw, making it a crucial step for anyone replacing their chainsaw chain:
| Adjustment Step | Description |
|---|---|
| Check Chain Fit | Ensure the chain sits snugly on the guide bar without excessive tension. |
| Turn Tensioning Screw | Adjust clockwise to tighten, counter-clockwise to loosen. |
| Test During Operation | Run the chainsaw to ensure smooth movement of the chain. |
Testing the Newly Installed Chain
Testing the newly installed chainsaw chain is essential to ensure optimal performance and safety. Begin by verifying the chain tension to achieve proper cutting efficiency. Next, inspect the installation to confirm everything is secure. After that, start the chainsaw safely, observing its operation to identify any issues. These steps are crucial for effective chainsaw use in gardening tasks.
Verifying the Chain Tension
After installing the new chainsaw chain, verifying the chain tension is a critical step to ensure safe and efficient operation. The chain must be tight enough to stay in contact with the guide bar without excessive slack, as this can lead to poor cutting performance or even derailment during use. Users should pull the chain slightly away from the guide bar; it should easily lift off the bar but still return without resistance.
To properly check the tension, it is advisable to consult the chainsaw’s manual, as different models may have specific tension requirements. Observing the tension during the chainsaw’s first run can also provide insights; the chain should run smoothly without any skipping or binding. This ensures that the chain is installed and tensioned effectively, promoting a better cutting experience for garden tasks.
If any adjustments are needed after the initial testing, adjusting the tensioning screw can help fine-tune the chain’s fit. Users should ensure that the chain is adequately tensioned before commencing work, as incorrect tension can lead to increased wear on both the chainsaw and the new chain. By prioritising this verification step, gardeners can enhance both the durability of their chainsaw and the efficiency of their landscaping activities.
Inspecting for Proper Installation
Inspecting for proper installation of the chainsaw chain is a vital part of the process after replacing it. Gardeners should ensure that the chain is firmly seated in the groove of the guide bar and around the sprocket. A well-aligned chain is key to avoiding operational issues, ensuring that the chainsaw performs efficiently and safely during use.
A thorough visual inspection helps identify any misalignments or gaps that may not be immediately apparent. It is crucial that the links are not pinched and that the chain moves freely without obstruction. Taking a moment to check this aspect can save time and enhance safety, as any improper installation might lead to accidents or tool damage when the chainsaw is in operation.
Furthermore, checking the washers and bolts for tightness reinforces the security of the installation. Loose components can result in vibrations or, worse, dislodgement during cutting tasks. Ensuring every part is correctly secured allows users to focus on their gardening projects with confidence, knowing their tools are safe and reliable.
Starting the Chainsaw Safely
Starting a chainsaw safely requires a few key preparations. Gardeners should ensure they are wearing the necessary personal protective equipment, including gloves, goggles, and ear protection. Once equipped, it’s vital to locate the starter mechanism, which can differ between electric and petrol models, to ensure the chainsaw is initiated properly.
After confirming the safety checks, users should position the chainsaw on stable ground, ensuring it is not on any uneven surface that could cause it to tip. For petrol models, the choke should be adjusted according to temperature, and checking for fuel leaks is essential before starting. Electric chainsaws should be plugged into a stable power source and inspected for any visible damage to the cord.
With preparations complete, users can start the chainsaw safely by pulling the starter cord or pressing the power button, depending on the model. Keeping both hands on the tool and ensuring a firm grip can help manage any kickback. Monitoring the chainsaw’s operation for smooth performance will indicate that the installation was successful and safe:
| Safety Measure | Action Required |
|---|---|
| Wear Protective Gear | Put on gloves, goggles, and ear protection. |
| Stabilise the Chainsaw | Place it on stable ground, ensuring no uneven surfaces. |
| Starting Mechanism | Pull the starter cord or press the power button securely. |
Observing Chain Operation During Use
Observing the chainsaw chain during operation is vital for ensuring optimal performance and safety. As the chainsaw runs, the operator should pay attention to any unusual noises or vibrations that may indicate improper installation or tension issues. A smoothly running chain will engage effectively with the wood, demonstrating efficiency in cutting while minimising strain on the tool.
While using the chainsaw, the operator should also monitor the cutting speed and effectiveness. If the chain appears to slow down significantly or struggles to cut through the material, it may suggest incorrect tension or alignment. Addressing these concerns promptly can help prevent further wear on the chain and maintain the overall health of the chainsaw.
Lastly, it is important to keep an eye on the condition of the wood being cut. Excessive smoke or burning smells can signal that the chain is either dull or improperly installed. Regular inspection during use allows the operator to identify potential issues quickly, ensuring a safer and more efficient gardening experience while using the chainsaw.
Maintaining Your Chainsaw Chain
Maintaining a chainsaw chain is essential for optimal cutting performance and longevity. Regular sharpening techniques enhance efficiency, while proper lubrication ensures smooth operation. Additionally, effective storage practices protect the chain from damage, and routine inspection for wear and tear prevents safety hazards. Each of these aspects plays a crucial role in keeping a chainsaw chain in top condition, supporting effective gardening tasks.
Regular Sharpening Techniques
Regular sharpening of a chainsaw chain is essential for maintaining optimal cutting performance. Gardeners should consider using a chainsaw file or a depth gauge to ensure the teeth remain sharp and effective. Keeping the chain sharp not only improves efficiency but also extends the life of the chainsaw, making it a vital part of upkeep.
To sharpen the chain, users can follow a systematic approach. First, secure the chainsaw on a stable surface and ensure it is disconnected from the power source. Then, using a round file, angle it into each tooth while following the manufacturer’s guidelines for the correct angle and depth, ensuring consistency across all teeth for balanced cutting performance.
After sharpening, it is also crucial to check the tension of the chain to maintain safety and efficiency while cutting. A properly tensioned chain will offer better control and stability during operation. Following these sharpening techniques can significantly enhance the chainsaw’s performance, enabling gardeners to tackle outdoor projects with confidence:
| Sharpening Step | Description |
|---|---|
| Secure Chainsaw | Stabilise the chainsaw and disconnect from power. |
| File Angle | Use the correct angle and depth according to the guidelines. |
| Check Tension | Ensure proper tension for safety and performance. |
Lubrication Tips for Optimal Performance
Proper lubrication is essential for the efficient operation of a chainsaw chain. Gardeners should routinely check the oil level in the chainsaw, ensuring that the bar and chain oil reservoir is filled before starting any cutting tasks. Using high-quality bar and chain oil helps reduce friction, keeping the chain operating smoothly and extending its lifespan.
During use, a well-lubricated chain allows for optimal cutting performance. Gardeners should pay attention to the oiling system of their chainsaw, as some models feature automatic lubrication which maintains a consistent oil flow. If the chainsaw does not automatically lubricate, it is important to manually apply oil to the chain regularly, particularly after extended use.
After completing work with the chainsaw, users should clean the chain and apply a thin layer of oil. This final practice helps protect the chain from rust and wear during storage. Proper lubrication not only maintains chain efficiency but also enhances safety, ensuring that the chainsaw performs well during future gardening projects:
| Lubrication Step | Description |
|---|---|
| Check Oil Level | Ensure bar and chain oil reservoir is filled before cutting. |
| Monitor Oil Flow | Pay attention to oiling system; apply oil manually if needed. |
| Clean and Oil After Use | Clean the chain and apply a thin layer of oil to prevent rust. |
Proper Storage Practices
Proper storage practices for a chainsaw chain can significantly prolong its lifespan and maintain cutting efficiency. Gardeners should store the chainsaw in a dry, cool place, away from direct sunlight and humidity, which can cause rust and deteriorate the chain’s materials. Using a protective case or cover can provide an additional layer of security, preventing dust and debris accumulation during storage.
It is also essential to ensure that the chainsaw chain is lubricated before storing it. Applying a light coat of bar and chain oil can help prevent rust and keep the chain well-maintained during periods of non-use. By routinely oiling the chain, gardeners can help ensure that it remains in excellent condition and ready for action when needed.
Lastly, regular inspections during storage can catch potential issues early. Gardeners should take the time to look for any signs of wear or damage, examining both the chain and guide bar. Identifying problems promptly can help avoid complications when the chainsaw is put back into use, ensuring a reliable and safe operation for all gardening tasks.
Routine Inspection for Wear and Tear
Routine inspection of a chainsaw chain is critical for maintaining optimal performance and ensuring safety during use. Gardeners should regularly examine the chain for any signs of wear, such as dull teeth or stretched links. Addressing these issues early can prevent more significant problems, helping to extend the lifespan of the chainsaw chain and improve cutting efficiency.
During an inspection, it’s essential to check for visible damage, including cracks or breaks in the chain links. Any noticeable wear can significantly impact the chainsaw’s cutting ability, leading to potential accidents or poor performance. Gardeners should also assess the condition of the guide bar, ensuring it remains smooth and free of burrs that could affect the new chain’s operation.
Additionally, regularly lubricating the chain and ensuring that the tension is correctly set enhances its longevity and cutting performance. Performing these routine maintenance checks not only ensures that the chainsaw operates safely but also provides gardeners with the confidence needed to tackle various tasks effectively. Taking the time to inspect the chainsaw chain can yield substantial benefits in both functionality and safety:
| Inspection Step | Description |
|---|---|
| Check for Dull Teeth | Ensure the teeth are sharp for efficient cutting. |
| Look for Visible Damage | Inspect for cracks or breaks in the links. |
| Assess Guide Bar Condition | Make sure it is smooth and free of burrs. |
Conclusion
Replacing a chainsaw chain is essential for maintaining cutting efficiency and ensuring safety during use. By regularly inspecting for wear, selecting the right replacement chain, and following proper installation procedures, gardeners can enhance both the lifespan of their tools and the quality of their work. Prioritising routine maintenance, including sharpening and lubrication, further supports optimal performance. Ultimately, taking these steps ensures that gardening tasks are completed effectively while minimising risks associated with a poorly maintained chainsaw.