It’s widely discussed that because fewer visitors enter your bedroom, it’s not justifiable to spend excessive amounts on impressive plants. However, we have to disagree. If you live in a studio flat, a “cosy” family house or a shared flat/house, the bedroom is an essential room for both benefits to your health and well-being.
Widely believed that plants have a great way of possessing a calming feeling, and we genuinely agree with this. Having plants inside your bedroom room can either create smells that are soothing and relaxing to aid with your sleep and help produce oxygen at night, which are great for indoor air pollution, and the bonus is that they look simply stunning.
We’ve put together a few of our favourite plants that you can have in your bedroom, along with all the benefits they will provide you. Recent studies recommend that you have 6-8 plants per room (although we have more), so here are our faves, so you have some options to choose from.
Although all of the plants we have chosen below can go into most of your rooms in the house (the bathroom can be a bit hit and miss), we just personally love these in our bedroom and cannot fault them.
We have also included plants discussed in the NASA research for plants with air-purifying qualities, so if we can’t convince you, we hope NASA can.
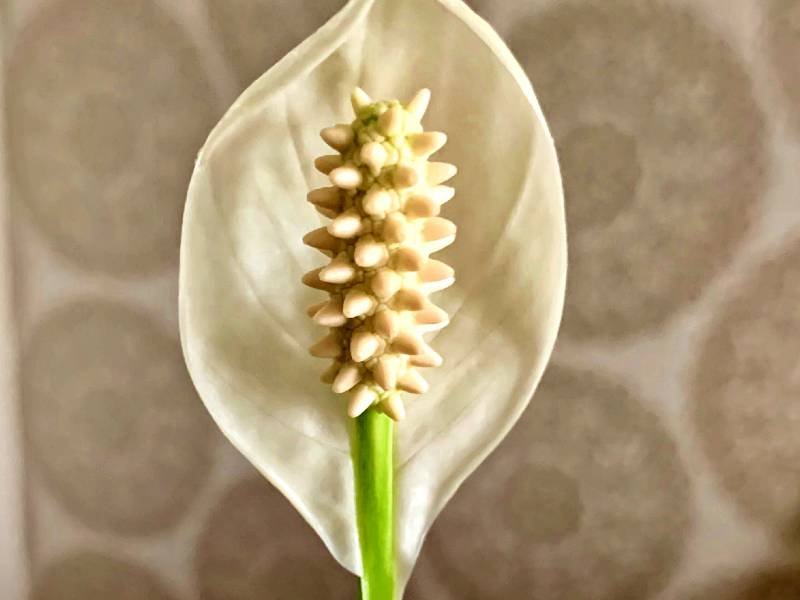
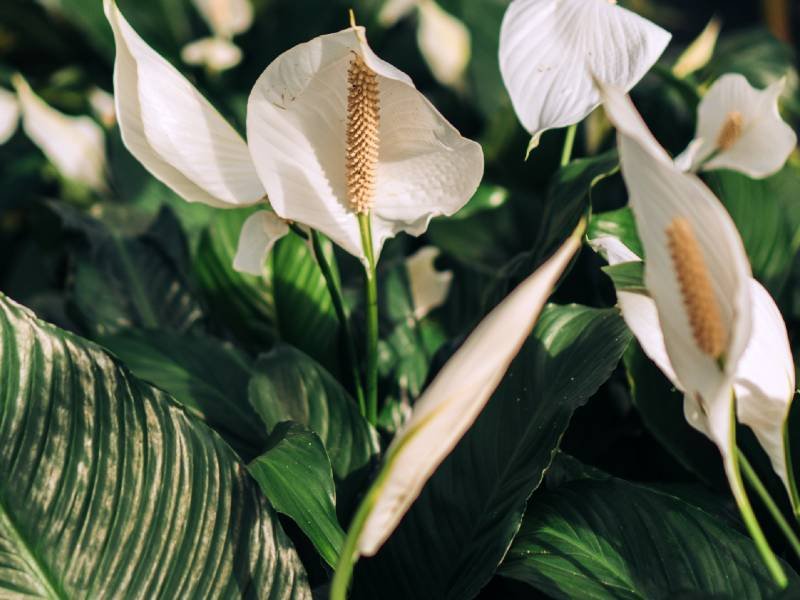
Peace Lily – Spathiphyllum
Part of the Araceae (Arum) family, peace lilies are not only beautiful, but their ability to remove indoor air pollutants makes them a perfect addition to your room. Excelling at removing alcohols, acetone, trichloroethylene, benzene, and formaldehyde from your air also increases the air’s humidity, which can have mild benefits of reducing allergies ease dry throats or sinus problems. We don’t know how you could not love this!
Peace Lily
Ideal location
First, the best place for your peace is lily is a semi-sun to semi-shade place; if you have an east-facing window in your bedroom, place nearby as they bloom the best in brighter light, but be careful as they do not like direct sunlight where the leaves may turn yellow.
If you notice the tips turn a brown colour and crispy, this means they have most likely burnt; move to a different location and cut these small tips off (not the whole leaf).
Lillies like temperatures that we like, around 16-24 degrees during the day and at night 13-20 degrees, will be idealistic for your lily. It is good to note that they do not like drafts, so make sure you place them in a draft-free location!
Peace Lily
Pests, Diseases and Problems
Like every plant, your lily may encounter a few pests and diseases along the way. Keep a lookout for fine webbing under the leaves or on leaf axils, as this is a sign of red spider mite. Red spider mite thrives in dry conditions and can be prevalent and hard to eliminate.
Scale and mealybugs are also pests you may find on your plants if they have a chance. To be clear of these, use soapy water or insecticidal soap when wiping down the leaves, and also, a monthly mist or shower is beneficial.
Peace Lily
General care and maintenance
You would think that they would be hard to take care of for all the benefits they give to you, but they are surprisingly fuss-free. We would recommend that when the soil is nearly dry, give it some water; it is also best to ensure you mist the leaves regularly to prevent an insect attack; regular misting will also benefit your lily.
They are the most enduring houseplants, and every once or twice a year, we would recommend washing or wiping down the leaves; as these are relatively wide, they are prone to becoming a dust magnet.
To wash lilies, use a damp cloth to wipe them down. Equally, you can wash the plant by setting it in the bath (or sink) and giving it a short shower and letting the tap water run over the leaves.
Another once or twice max a year job for your lilies is to give them some fertiliser; this will help with their overall happiness.
They won’t typically need re-potting regularly, but it will give you signs when it does; one of these will be the leaves drooping after around two weeks of watering, another is the leaves will start to grow in a deformed way and become squashed—re-pot around April time. Your lily will also appreciate the new fresh soil.
Peace Lily
Watering
It is good to note that they will need a bit of guesswork when it comes to watering. One big sign that Lillies need watering is when they start to become limp (wilting); once watered, it will perk back very quickly!
It is also another case of its best to be under-watered than overwatered and not sticking to a watering schedule – some people even suggest waiting for it to become limp before watering. We would suggest letting your lily dry out between watering. If you are using tap water, lilies can be very sensitive, so we recommend using rain or bottled water or equally filtered room temperature water.
Peace Lily
Are they toxic?
Please be mindful that this plant is very toxic to animals and also humans if eaten! So if you have pets, place your lily in a safe place or go for a plant that is not toxic.
Lavender – Lavandula
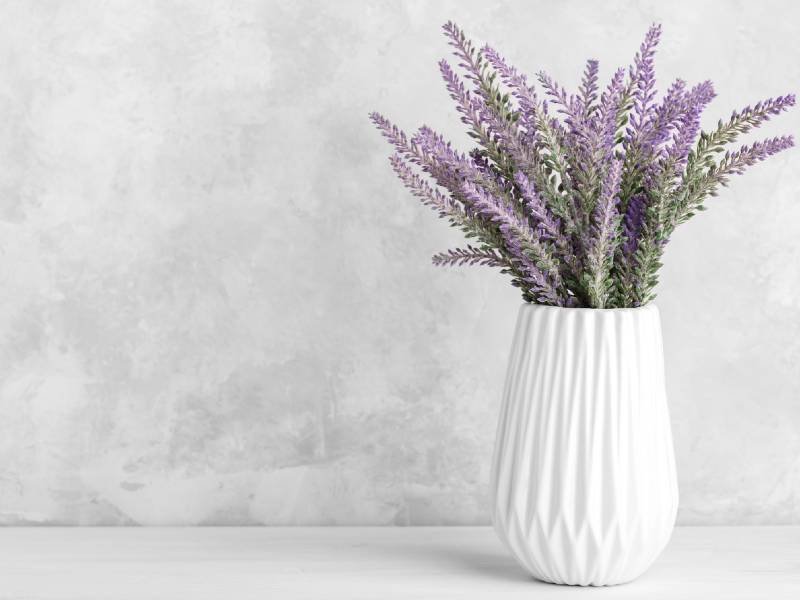
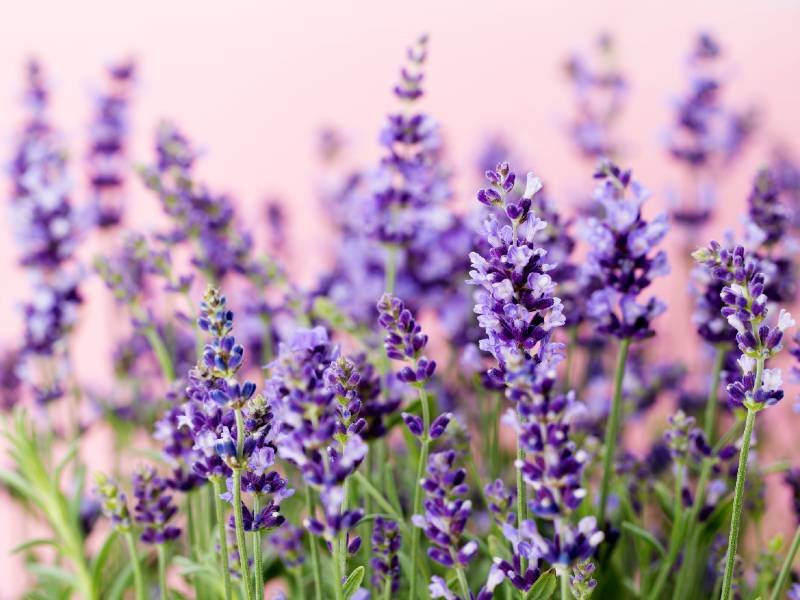
We can only start with the smell of lavender, it is one of them love or hate smells, and we can hand on heart say that we love it! Relaxing scents don’t come more calming than lavender, used in aromatherapy as a natural aid to help with sleep over many years.
We have a lavender plant on our bedside table and use a lavender mist spray, and we are believers that it has helped our sleep! Now, we know lavender is typically not thought of as a house plant, but under the right conditions, it will survive. However, it did take us a while to master the art of keeping this alive (R.I.P to a few lavender plants that didn’t make it).
Our top tips are, first, try to give your plant bright, direct light for around 3-4 hours every day, preferably in a south-facing window and rotating weekly to ensure equal growth and flowering. Without having bright hot light, it will not produce any foliage and most likely dry out.
Lavender
Ideal Location
The ideal location will provide your lavender with good air circulation and ventilation away from a crowded spot. A good tip is by an opening window, but avoid placing it in direct airflow of heat. Due to the high humidity in bathrooms or laundry rooms, we would not recommend these rooms.
If you bring your lavender in from the garden for a long time, give it time to adjust and acclimate indoors. If you decide to put yours outside during the summer, it is best to quarantine your plant before moving back in and not leaving outside during the winter months.
We recommend using sandy soil or planting on a raised bed, which will help prevent root rot and fungal disease, causing overwatering. Your outdoor lavender plants will be more susceptible to other diseases.
Lavender
Pests, Diseases and Problems
Pests and diseases will rarely attack your lavender plant, and the main problem that will occur is when you overwater your plant. However, they can bounce back – with watering, and less is more when inside the home, but outside they are naturally prone to more water and weather changes.
Lavender
Watering
When it comes to watering your lavender, let the soil dry out slightly between watering checking this by using your finger, then thoroughly water, typically about once a week.
Try not to overwater or allow the soil to stay constantly wet as this will most likely cause root rot. You may also notice the lower leaves yellowing. You should also rotate your lavender after watering to ensure even growth all around.
The best way to water your lavender is to pour the water directly onto the soil. Try to avoid watering directly over the foliage, as this will entice pests and mould.
Lavender
Best Indoor Variety
French lavender is an excellent choice for indoors; this is recognisable by its serrated leaves. It does not grow as tall as some other varieties and will thrive more inside your home.
Some varieties of these are; Lavandula heterophylla, Lavandula stoechas or L. Jean Davis. If you live in a colder climate, hybrid lavenders are hardier than other varieties Lavandula x intermedia ‘Provence’.
Lavender
Choosing the best pot
When choosing the right pot, these best would be a terra cotta style due to its quick-drying material, as it is essential not to let the roots drown.
This also helps the climate to be more Mediterranean. We would only recommend re-potting in early spring once a year. Lavender grows best in soil that is not too rich but in sandier soil.
Lavender
Are they toxic?
Make sure to check that you are not allergic to lavender. Some suggest that lavender is not toxic to animals, but we would always advise keeping this away from them – so be careful.
Areca Palm – Chrysalidocarpus Lutescens
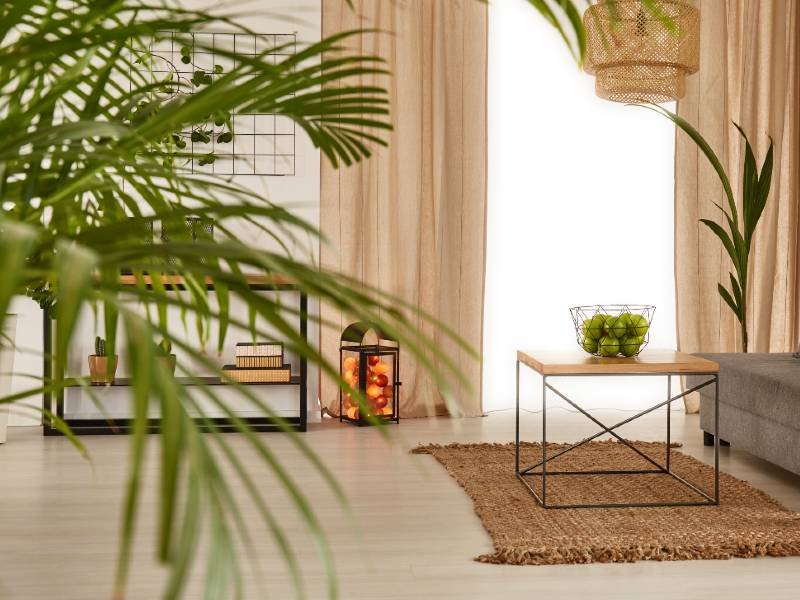
One of the most popular and graceful plants and there is no doubt why you wouldn’t want this in your bedroom. Also known as the yellow or butterfly palm, this is tolerant of many environments, but it is best for removing chemical toxins from the air.
Acetone, Xylene, Toluene and Formaldehyde are harmful pollutants removed from the air and provide you with fresher air. Some research has even gone as far as to say this plant is just as effective as an air humidifier! You really can’t go wrong with the areca palm.
So here are all the tips to keep your areca palm happy and healthy and lucky for you. Although, if you are new to the green thumb world, they are relatively straightforward, so we wouldn’t suggest this being your first plant choice.
Areca Palm
Ideal location
When searching for the perfect location, choose a spot with semi-sun. They won’t tolerate being in direct sunlight, as this can scorch the leaves, but equally, not giving them enough light will cause slow growth.
It’s best to place it in a reasonably bright room in your house that receives a lot of sunlight; if your home is relatively dark, we would suggest not getting an areca palm as the lack of luminosity will not be appreciated.
Areca palms also won’t do well in drafty places as this may cause brown spots to leave. Another reason your plant may display these spots is due to sudden temperature drops in the air.
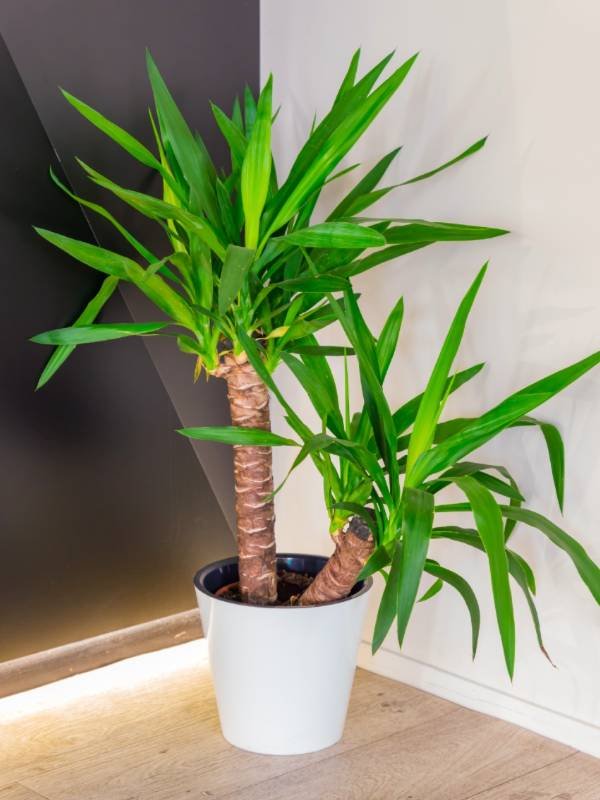
Areca Palm
Pests, Diseases and Problems
Red spider mites are reasonably common in areca palms, these pests are pretty hard to spot, and you will most likely notice the spider cobwebs first. Red spider mites are the most feared because they are so prevalent and challenging to be rid of.
Areca Palm
Watering
Brown spots may also be a symptom of overwatering although these are permanent, it is a good indicator to start looking after your plant – water less, keep warm and try to use rain or bottled water instead.
Combined with this, overwatering will also encourage fungi such as root rot. As this plant is susceptible to this fungus, it is best not to let it sit in constant water log conditions.

Areca Palm
Soil and drainage
Areca plants love moist soil, so try to keep the soil moist as much as you can but avoid it becoming soggy! If you’re wondering what the main difference between the two; moist is just slightly wet when you touch the top of the soil, whereas soggy is when the plant is soaked.
Be sure that you have good light drainage soil that is rich in nutrients as well as a bit on the acidic side – sandy loam is a good option as this provides the best earth environment for the roots of the palm to spread; peat moss mixed with sandy soil to add more nutrients.
Areca doesn’t like their roots compacted in the soil like clay as this has very few air pockets. Heavy soils can suffocate the roots, which can cause problems such as root rot and growth stunting. Also, be sure that your pot allows for good drainage.
You can add 2 inches of pebbles to the bottom of the pot and a drainage plate to help your plant between waterings. As they also prefer high humidity levels between waterings, it is also beneficial to mist your palm or run a humidifier.
Areca Palm
Re-potting
Areca palms prefer not to have their roots disturbed, so lots of re-potting will cause more damage and potentially stunt growth. As they don’t typically grow that quickly, they don’t mind being in smaller pots and have their roots a tad bit cramped; we would suggest completing this every couple of years max.
It is more typical for shops to sell larger full-grown plants, but if you do happen to secure a young plant, re-potting in spring every year until it reaches maturity is a top tip; ordinary potting soil will be fine for this palm.
Areca Palm
Leaf Shine
Another good tip we can give you is to avoid using leaf shine products. Instead of using a damp cloth and a quick shower every few months will work and leave your leaf looking green and shiny!
Areca Palm
Fertiliser
Fertilising your palm is best to be completed during spring and summer, with a palm fertiliser or a standard diluted feed – if you have re-potted and used a new potting mix, do not use fertiliser for two months.
Areca Palm
Are they toxic?
When you thought this plant couldn’t get any better, this plant is non-toxic to animals and humans, so there is no fear with this plant in your house.
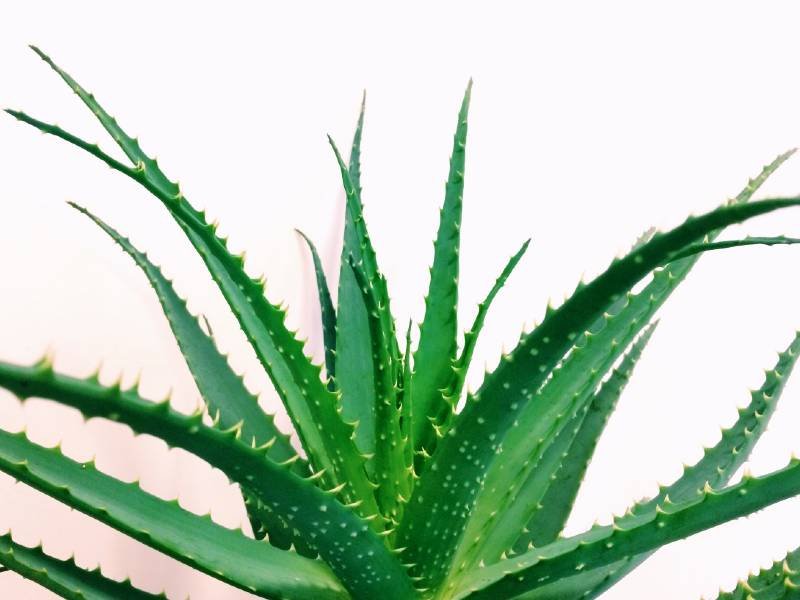
Aloe Vera – Aloe Barbadensis
This beautiful succulent has been used in folk medicine for over 3,000 years. The inside of the aloe vera leaves are still today used to treat sunburns and cuts and is also found in many cosmetics.
They are an attractive, easy plant that makes for a great addition to any room. Not only this, but overnight your aloe vera will release oxygen and absorb carbon dioxide, removing formaldehyde and benzene, making them a perfect option for the bedroom! And what makes it even better is if you see below just how easy looking after your aloe vera can be.
Aloe Vera
Ideal location
Your plant’s position is pretty vital as direct sunlight can cause it to dry out, and the leaves can turn yellow. The perfect position with semi-shade to semi-sun, so try to find somewhere that offers bright indirect sunlight- typically south or west-facing window, they will not survive in shady areas.
You will find your aloe preferring temperatures of around 13 and 27°C and being a variety of succulent thrives in dry conditions. As they are 95% water, if left in very frosty temperatures, they will freeze up and turn to mush – that being said, we only recommend keeping them inside the house.
Aloe Vera
Pests, Diseases and Problems
Looking after your aloe vera is typically very easy, and they are very low maintenance; pests and diseases will very rarely attack them. However, mealybugs and scale will be the most susceptible pests you will find.
Mealybugs are flat brown/tan insects found on the leaves as they suck on the saps. The best way to get rid of these pests is with a natural pesticide. An excellent tip to help prevent this is by misting your plants every week or so.
You will find more of your aloe vera plant problems: root, soft, fungal stem, and leaf rot. All of these common problems are likely the cause of overwatering – if you notice browning leaves at the end, the most typical reason will be overwatering, sunburn or if the soil is not draining.
To prevent these overwatering problems, move your plant to another location in your room, making sure they have enough space and are not all crowded in one area. Lastly, one other way to help with the overwatering is buying a water globe, which means your plant will only take the amount of water they need.
As this is a succulent, they can all retain water well; therefore, if you forget to water for a couple of days, this isn’t a massive problem and your vera won’t mind; however, it is best to let the soil dry about 2 inches between watering.
Aloe Vera
Watering, feeding and re-potting
The most common death for aloe veras is overwatering, so be mindful of this. We would recommend watering moderately in spring, summer and autumn; during the winter months, water sparsely – but most importantly, watering less is better than more!
Another good tip we can give you is if you have just recently re-potted, wait 2-3 days before watering, then allow the roots to adjust. When it comes to feeding, a good rule of thumb is to not feed in autumn or winter but feed once a month in spring and summer.
Aloe Vera
Choosing a pot
It’s a good idea to plant your aloe vera plant in a porous type container such as terra-cotta; this is so that it will allow the soil to dry thoroughly between watering as a plastic one will retain water.
Combined with this, choosing a pot with drainage holes is beneficial to allow excess water to drain out, stopping it from sitting in water; another good tip is pot as wide as it is deep.
When choosing soil, it is best to go for a succulent well-draining potting mix containing either perlite, lava rock, coarse sand, or all three. Using these techniques will help with the overall health – as although they are a hardy plant, lack of drainage will be the main reason for death.
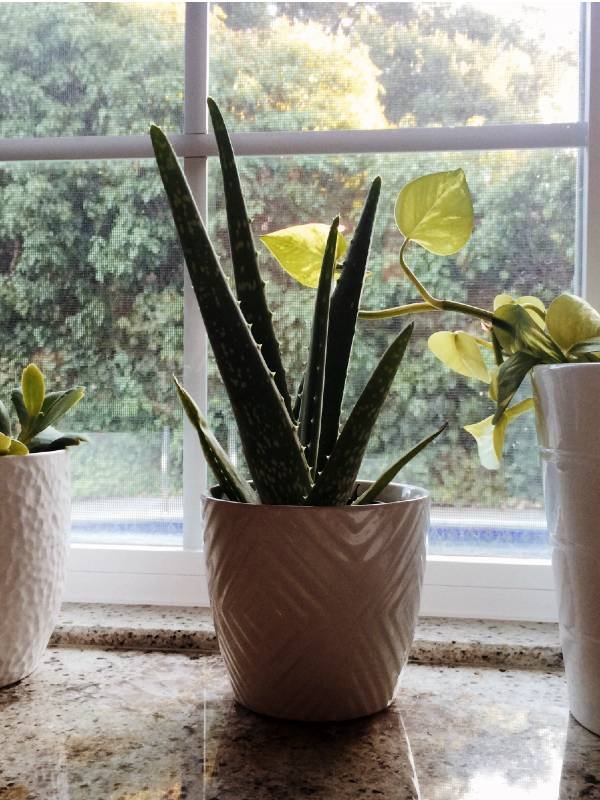
Aloe Vera
Useful Tip
A good tip when this plant produces new offsets, remove them to start new plants. These can be used as a replacement if you decide to remove the leaves to harvest the healing gel.
Aloe Vera
Are they toxic?
Aloe vera is toxic to humans and animals if ingested.
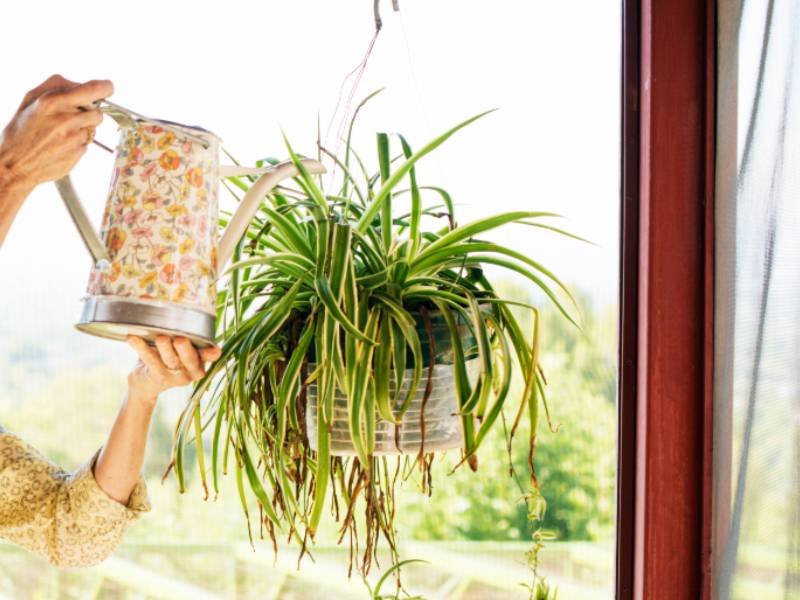
Spider Plant – Chlorophytum Comosum (Vittatum)
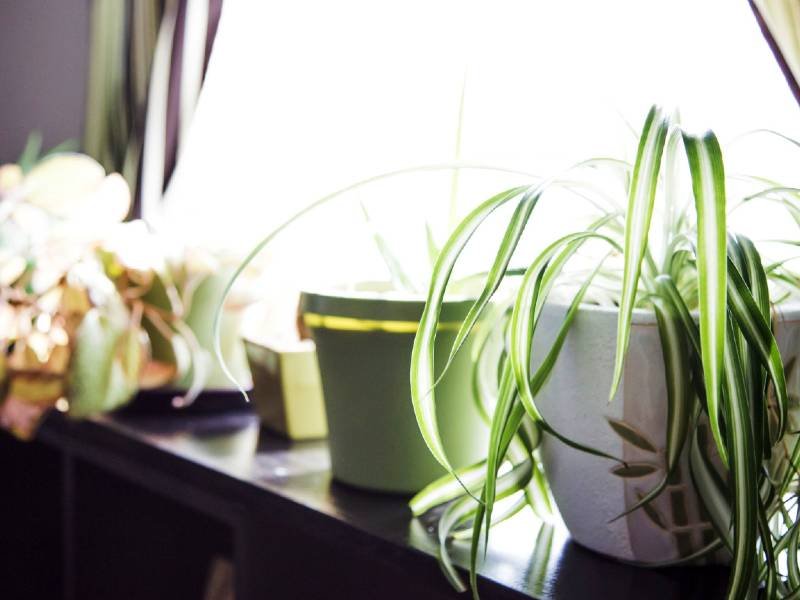
Spider plants are a popular, easy-going plant and another great option we would recommend. When displaying this plant, they look great when the leaves and the flower stems can hang freely over.
Therefore, to allow your spider plant to hang, some suggestions are a hanging basket, pedestal, shelf or on top of a cabinet, desks or chest of drawers.
You may also know this plant as the ‘Airplane Plant’, which derives from producing multiple ‘pups’ that dangle from the mother plant on its stems. You can choose to leave these in place or clip them and re-pot, which can be perfect gifts. One of the only very minor downsides of spider plants is that they won’t produce beautiful blooms. Still, it can remove up to 90% of potentially toxic chemicals that are potentially floating around the air.
Spider plant
Ideal location
Known for being one of the most adaptable houseplants, you will find looking after these plants very easy, so they are perfect if you are new to houseplant life. We love these plants because they will survive in most areas, but try not to place them in direct sunlight as they will burn – if you plan to put them in a window that receives a lot of bright indirect light, this is the perfect environment!
Now and then, rotate your plant around, and you will find it will flourish all over! You can also place your Spider plant into a lower light if needed, but the growth will be weaker. Another place to avoid is by or on a heater or air conditioning unit; apart from these few no go places, your plant should be okay anywhere else.
Spider plant
Pests, diseases and problems
Aphids, scale insects and mealybugs are a few pests that you may encounter. These will typically eat the leaves on your plant. However, they are tough when it comes to these, so you can avoid these by misting your plants now and then; if, unfortunately, they don’t clear up and worsen, you can use natural insecticides made with vinegar.
Spider plant
Watering, feeding and re-potting
Regarding watering your spider plant, less is more; they can tolerate droughts as their roots can store water, but try not to do this unnecessarily and for an extended period. On the contrary, try not to let the plant’s soil become too soggy as this will lead to root rot; they do not like being sat in water.
If you notice the tips turning brown, your plant is giving you a sign it will need re-potting or feeding. To prevent this from happening, give your plant a liquid feed once a week from June until September, and if it needs re-potting, do this preferably in March or April.
It is best, in this case, to let the soil fully dry out between watering, which you can check by putting your finger in the soil. If you have a baby spider plant, the rule of thumb is to water occasional rather than weekly, but be sure to check soil! As your plant becomes fully mature, you will need to start watering more often.
Once a month, if that, in the spring and summer season, you can give it a growth boost with a liquid fertiliser. We would recommend an all-purpose or granular time-release fertiliser. However, we would recommend you to do this sparsely as too much fertiliser can cause the leaves to turn brown.
Another stress-free thing about spider plants is that they don’t need to be re-potted very often at all – what a relief! Your plant, however, will let you know when it does need re-potting, and if you notice the root ball rising above the rim of the pot, then you will know it’s the time!
As with most others, spring is the ideal time to re-pot your plant. Another good tip to know is that your spider plants will love you if you give them soil with good drainage. You can use typically any good organic soil and potentially even cacti/succulent soil, but make sure whichever one you pick has good drainage.
Spider plant – Cool factDid you know there are over 200 species of spider plant!
Spider plant
Are they toxic?
They are posed as non-toxic, but they can be harmful to cats and cause them an upset belly and sickness, so be mindful of this.
Corn plant – Dracaena fragrans
Commonly known as the happy plant or massangeana, these are an oldie but a goldie. We adore this plant for its excellence in removing air toxins such as formaldehyde, xylene, benzene, and trichloroethylene and some of the most popular plants.
Part of the Agavaceae family is identifiable by its broad yellow band down the middle of its shiny medium green leaves – it truly is a stunning plant. Inside your homes, these will grow up to the height of 3m (10 ft) and will no doubt brighten up your bedroom, and if your plant is happy, you may even be rewarded with small, white flowers.
The corn plant is tall and narrow, so good for that one space in your bedroom that you don’t know what to fill with. Here are all the tricks to ensure that your corn plant is as happy as can be.
Corn Plant
Ideal location
You will find that this will be happiest in bright light locations near a window but with filtered light protected from direct sunlight and drafts.
Your corn plant will not tolerate direct solid rays, so if this is the only place for your corn plant, we would recommend trying to use blinds or curtains to filter the light to ensure its healthy growth. It can, however, survive in dimly lit semi-shade areas resulting in leaves losing their stripes and their growth becoming stunted. Therefore, we wouldn’t recommend it if you can help it.
Combined with these environments, it’s best to keep these away from extreme conditions – strong winds, overly warm cold or warm temperatures, so if you have a window open, try to keep away from this. I guess you could say that they are just a mediocre plant.
Corn Plant
Pests, diseases and problems
Pests will rarely attack your corn plant. Still, it is susceptible to mealybugs, which will leave a sticky residue on your plant’s leaves, causing loss of leaves, stunted growth, and weakening them overall.
You may also notice a white fluffy/wax- where underneath the pests and their pink-orange eggs can be found. The best way to get rid of these is with a strong spray of water; you can also see other methods here.
Another pest you may encounter is spider mites, especially in dry, centrally heated air. Although they are not visible, you may notice discolouring to your plants leaves displaying yellow or brown spots; then, you may see white eggs laid near the plant’s veins on closer inspection.
The best way to get rid of these pests is to hose down the leaves in the bath, shower or outside with a hose. (be careful not to overwater in the meantime) Another option would be miticide spray; we recommend this because it’s non-toxic and perfect for your plant and inside the home.
Like most, your plant will give you clues when it needs adjustment to its living conditions which can be examples of needing more or less water, the air quality isn’t working, or they need pruning. Another indication from yellow/brown spots on the leaves could also be overwatering or toxicity problems from fertilisers.
Mist, mist, mist – as your corn plant will thrive in a humid environment. These plants will love you if you give them a generous misting sparing with the watering, especially during wintertime, also using a damp cloth to wipe the leaves down, which will not only prevent the infestation from pests but also allow the plant to transpire freely.
Corn Plant
Watering and Feeding
Regarding watering as general advice, water every 7-10 days, but it’s good to stick to using your finger to check the top of the soil. If it’s dry, give it some water and water until the soil becomes moist.
In the wintertime, you don’t need to water as frequently as they are semi-dormant. Your corn plant will let you know when and if you have overwatered it and will result in leaves dropping, wilting or the worst case is death. Due to their low maintenance, they can tolerate lower amounts of watering, but this isn’t the best idea and try not to do this too often.
An excellent tip to get your plant to love you even more, is by giving it a feed with liquid fertiliser annually. We wouldn’t suggest adding this a lot; corn plant leaves can turn brown due to two ingredients, baron and fluoride, which they do not like. As they are typically slow-growing plants, fertilisers won’t help much in contributing to this, so be mindful if it doesn’t shoot up.
Corn Plant
Soil, drainage and re-potting
Corn plants will grow well in potting soil, but hydroculture soil is the much-preferred option, but equally, a well-drained potting mix will also do the trick; they love soil rich and moist. When it comes to re-potting, it’s best to do this annually, maintaining their overall health.
When lifting from the current container, they prefer it when their roots are not disturbed and are not too tightly compressed in the new soil as this will not help with the drainage. A pot with holes and a drip tray at the bottom will also contribute well to this.
Corn Plant
Are they toxic?
Unfortunately, one of the only downfalls is that this plant, although non-toxic to humans, is toxic to cats and dogs even without swallowing. So we would suggest avoiding it if you have any pets.
Gerbera Daisy – Gerbera Jamesonii
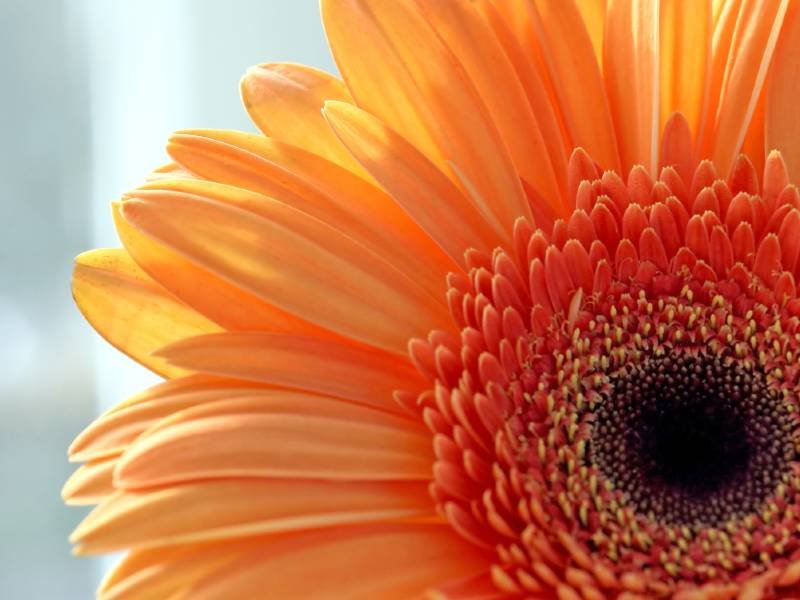
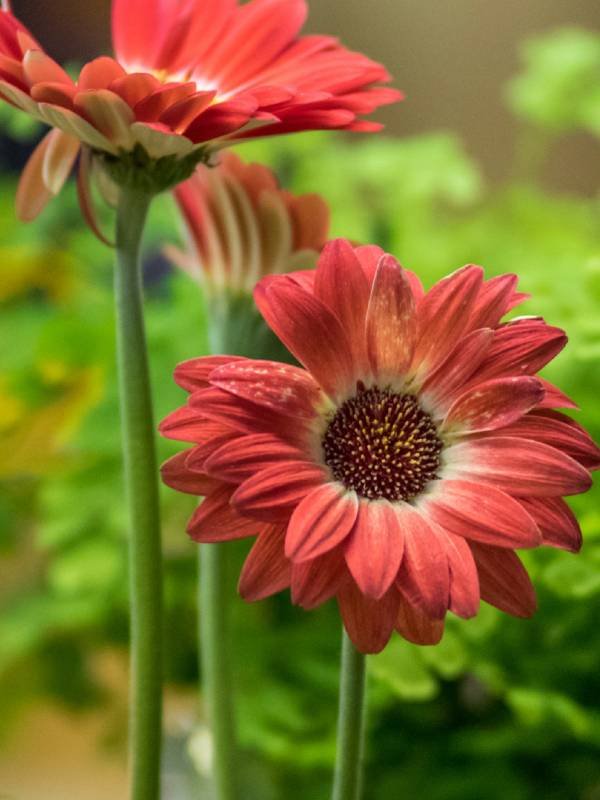
There is nothing better than having some colour added to your room, and gerbera daisy will do just that! These beautiful plants can come in pinks, yellow, orange, whites and pinks, and although many people believe that the blooming season will only happen once before needing to be discarded, if you give your gerbera a bit of plant-loving care, it can last 2-3 years.
What makes these even more appealing is that gerbera variety is meant to have the added meaning of cheerfulness, derived from its array of different colours, helping reduce stress. One important note is that these aren’t the easiest plants to look after, so if you are new to the green thumb life, we would advise going with an easy type first.
Gerbera Daisy
Ideal location
We understand if you want your gerbera daisy on full view to display; however, there are a few places to be careful of. They love bright lights, particularly in the morning, but be mindful that they are protected as they don’t like intense light. However, if you place your plant somewhere that gets indirect sunlight, try to ensure that your plant will receive some light.
We would recommend avoiding placing in a sunny window, as this can be too hot for it, and you may find the leaves scorched, equally; if they don’t get enough light, they will not bloom and may cause the plant to become leggy and pale. It is recommended to get some supplement light on them in the winter, such as a lamp or overhead lights.
If you can provide your plant with enough bright light, the rest of the care is pretty simple. Temperature-wise, your daisy will thrive best at 70ºF; they can tolerate low temperatures of 30ºF.
Gerbera Daisy
Pests, diseases and problems
Aphids are the main pests that could affect your daisy. Aphids tend to multiply and develop quickly, so it’s best to get on top of these as soon as you notice.
Aphids are tiny sucking insects, the most common aphid on houseplants will be recognisable by their light green (pear-shaped) bodies, but they also can be found in pink, white, grey and black. As soon as you notice these, it’s best to start tackling them ASAP!
They can establish quickly and spread to your other plants; it’s good to note that if you notice, winged aphids can appear when the colony has been established, which is how they spread and infect new plants.
There are a few ways to be rid of these; the first method can be using a strong stream of water to wash them away; however, dipping them in water if they are flowering is another method.
The flowers are prone to developing grey mildew, which typically occurs in very damp conditions. You may notice the leaves become covered in this, leaving various grey spots over; when the flowers are infected, they will develop brown spots, which tend to expand after the flowers have been picked.
Although you may think this is pretty harmless, the mildew can infect the stem and roots, eventually killing your whole plant. To prevent this, leave your flowers to dry and avoid the leaves getting wet when watering.
Gerbera Daisy
Watering
Typically water your daisy every 3-5 days. Still, these are very dependent on humidity and temperature, however like most, allowing the soil to dry out by ½ inch from the top between watering is the best way to know when to water.
Gerbera Daisies do like a lot of water but not as much to make the ground moist; therefore, it is best to check the drip and empty if any water has been collected after watering.
During the wintertime, you will notice you do not need to water as often. Another watering tip, make sure that you do it directly onto the soil, and avoid wetting the flowers themselves, which can damage them!
Gerbera Daisy
Soil
The best soil for your daisy is an average to rich soil that has medium moisture conditions. One major must is to have soil with great drainage, as the garbage is susceptible to root or stem rot – so be mindful when choosing the soil.
Gerbera daisies tend to develop deep root systems, so re-potting too often isn’t a good idea. As they only really survive for roughly three years as potted plants, it’s good to keep this in mind when choosing a plant for your bedroom. These also do well outside your home and look amazing in the garden.
Interesting Fact - You may notice your daisy closing up at night. They do this to save energy for the next day! Once the sun is shining, their blossoms will reopen!
Gerbera Daisy
Are they toxic?
Although non-toxic to humans, it can be toxic to cats and dogs if ingested. So we would suggest being careful if you have pets.
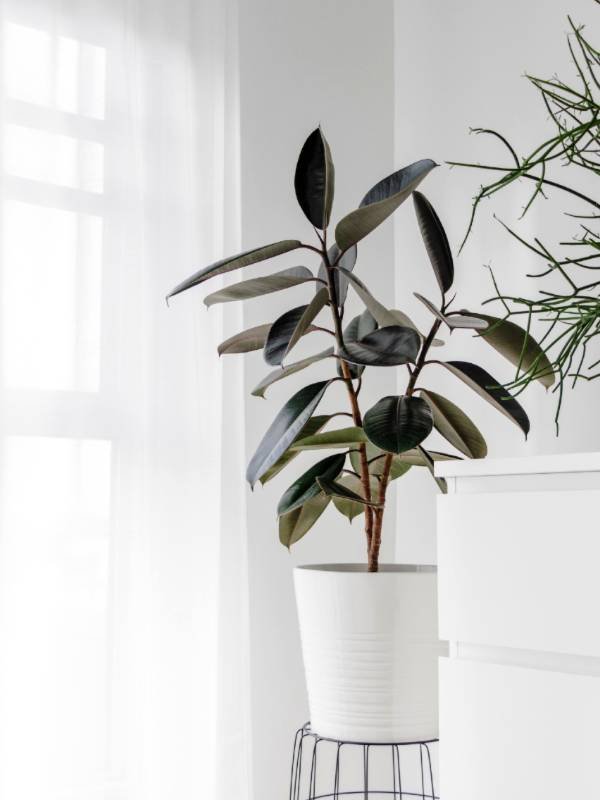
Rubber Plant – Ficus Robusta/Elastica
Newbies to the green thumb life – this is your time to shine! The rubber plant, known for its hardy and toughness, will survive any light or temperature conditions.
Not only long-standing favourites amongst the Victorians but also architects and interior designers now favour this for aesthetic value, ease to grow and ability to remove chemical toxins from your room, in particular formaldehyde.
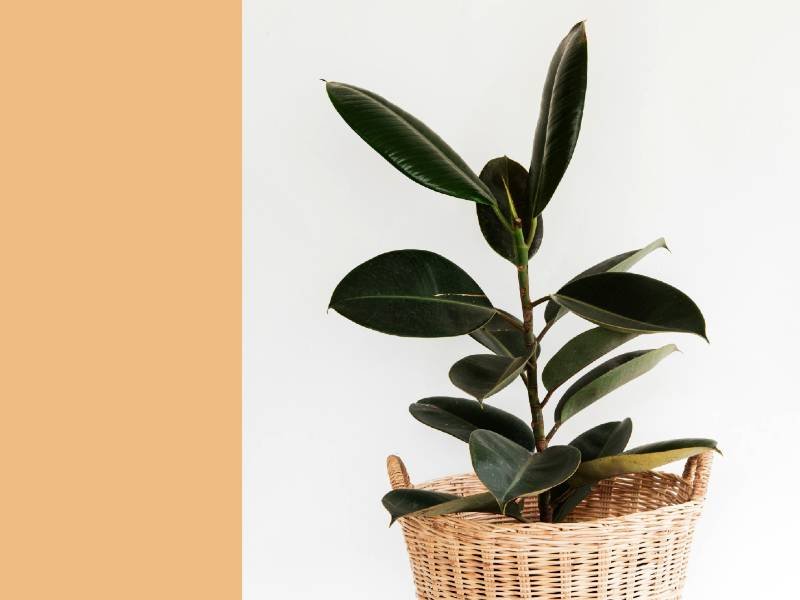
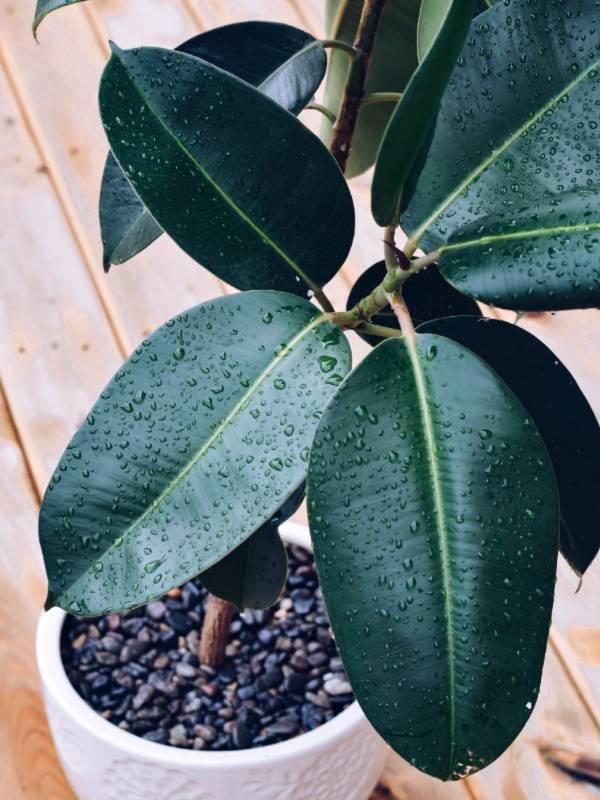
Receiving its name from dark-green, rubber-like latex leaves, your plant will grow up to the height of 2.5 m (8ft), making it a great addition if you have a large room or even a small corner that needs filling.
Now we love a rubber plant in our bedroom not only for all the benefit you receive in the air quality, but it is just a simply stunning plant.
Rubber plant
Ideal location
When choosing an ideal location in your bedroom, find a place away from drafts, direct heat or chill. Brightly lit but without direct sunlight – specific varieties will take to some shady spaces, but this can cause the plant to become spindly, so try to avoid if possible; other variegated varieties will not do well at all in shady spots.
Temperature-wise, your plant will be able to grow in a range between 10°C (50°F) to 29°C (85°F) we would not recommend any hotter than this. Other than that, your rubber plant will be pretty much happy anywhere!
As we mentioned before, this is the perfect plant for a busy person or a newbie to the green thumb world, and that also corresponds to pests and diseases your plant may get.
Rubber plant
Pests, diseases and problems
Overwatering is the most common problem you will find. One indication you are giving your rubber plant too much water is the loss of leaves – once you have noticed this, it is vital you act out on it as soon as; first by letting it dry out.
The loss of leaves can also be a sign that you need to move your plant; typically, if they are in draft or low-temperature areas, it is normal for a few of the bottom leaves to turn yellow or drop if they have recently been moved from a light to darker location.
Hence, it is a good idea to check the conditions of your plant. If you notice the leaves turning yellow, this could be several things; underfeeding, even overwatering or poor soil – it’s hard to advise on this apart from eliminating what you are currently doing by using our tips above.
When it comes to pests in dry, centrally heated air, you may find your rubber plant becoming susceptible to scale insects, spider mites or mealybugs.
Rubber plant
Watering and Feeding
When it comes to watering your rubber plant, as you may have read above, avoid overwatering! We would suggest giving it a good watering and then waiting for the soil’s top to dry about an inch before repeating the process.
The trick is not to drown the root in water, typically will not dry out within the week, and despite some telling you once a week is best – honestly, the best method is checking the soil with your finger.
It is best to water less in the winter months, keeping the soil moist and letting it dry out. It’s a good idea to mist your plant when you can, especially if the air is very dry, but creating a humid environment is not a major necessity for your plant; but they will appreciate this for their healthy growth.
During the summer months, feed your plant regularly with a weak liquid solution – this will help produce the big rubber leaves.
Rubber plant
Soil and Re-potting
This plant will grow well in most soils; we would suggest a fertile potting mix as this drains well. Using straight potting soil tends to retain too much moisture, so try not to use this if possible.
If you decide to make your mixture, using peat, pine bark, and coarse sand in equal amounts is the best of your focus. In the months of May-June, this will be the best time to re-pot.
We would suggest doing this every year when your plant is young and once matured every three years – and also always best to report during this period when the plant has become pot bound. You may notice sap that oozes out of the leaves, particular in the Ficus elastica.
This sap is a white soap like looking substance but treat this carefully as it can be irritable to humans and animals. It is best to clean this sap away if you notice it, ensuring you get any on your skin to wash away thoroughly.
Whilst doing this, it is a good idea to wipe the leaves to keep them clean, keeping your plant healthy. One last thing it’s also good to note is that the growing speed rate of rubber plants is quick. You can prune your plant without adverse effects.
Rubber plant
Are they toxic?
Rubber plants are poisonous to cats and dogs, so be mindful when you are buying these.
Let's go Shopping...
Products Coming Soon!

