Quick Facts
Botanical / Scientific Name – Allium cepa (fam. Alliaceae)
Plant type – Hardy biennial cultivated as an annual
Sun Exposure – Full Sun
Soil type – Rich, firm and well-drained fertile soil
Soil pH – Neutral
Bloom time – N/A
Flower Colour – N/A
Special Features –Easy care and versatile. A reliable kitchen garden favourite.
The original species of onion can be split into several types; the main kinds of interest to the gardener are:
- A spring-sown maincrop, harvested in Autumn.
- An autumn-sown crop harvested as bulbs in the following Autumn.
- Onion sets, small bulbs planted in Spring for fast growth.
- Japanese varieties are sown in late Summer to continue growing over a mild winter and produce a crop the following midsummer.
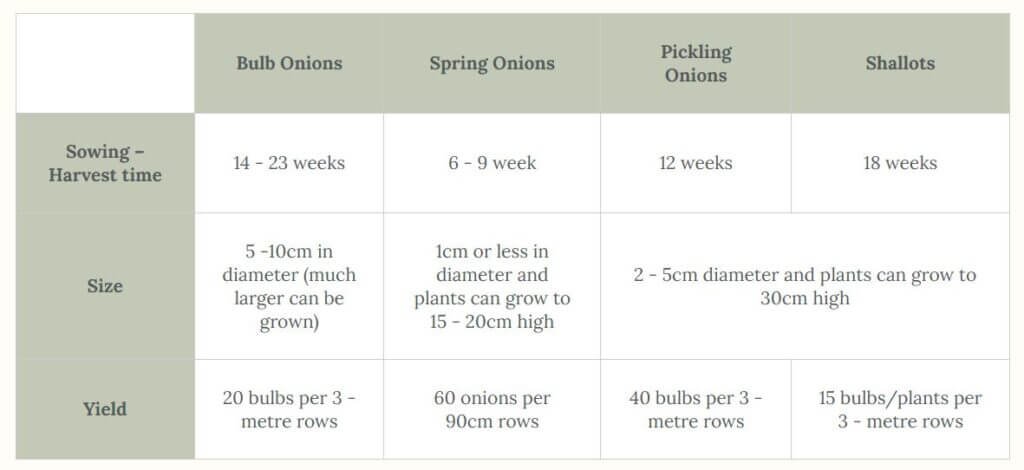
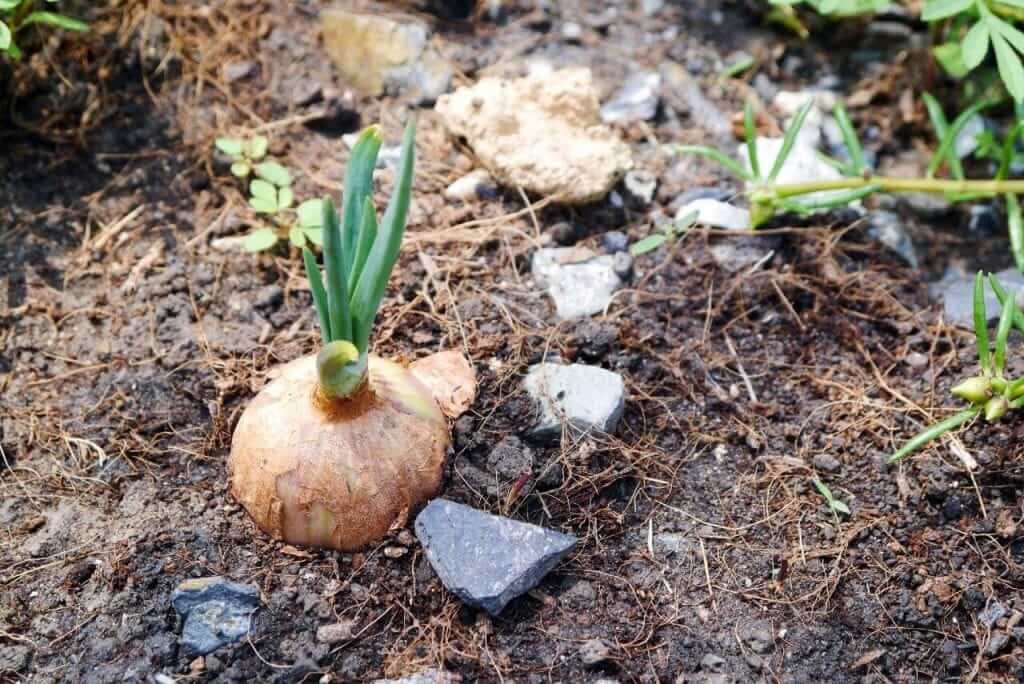
Why should I grow Onions?
- Onions are among the most regularly used of all vegetables, and they are well worth growing at home.
- Long shelf life if stored correctly – most onions store so well that whatever you grow you can eventually use up leaving the possibility of waste.
- An onion crop may be grown on the same site for years, providing that there is no sign of disease. Onions can also fit well into a crop rotation, providing a break from brassicas, peas, beans or potatoes.
Where is the ideal location to grow Onions?
- Onions do best in an open sunny site that has good drainage.
- In August, dig thoroughly adding compost, potash and manure.
- If you find that the soil is acidic, liming can reduce the PH scale of the ground.
- Before you plant or sow your onions, prepare the onion bed by adding a general fertiliser and rake the soil to help thin out the soil.
- Avoid planting near peas or beans.
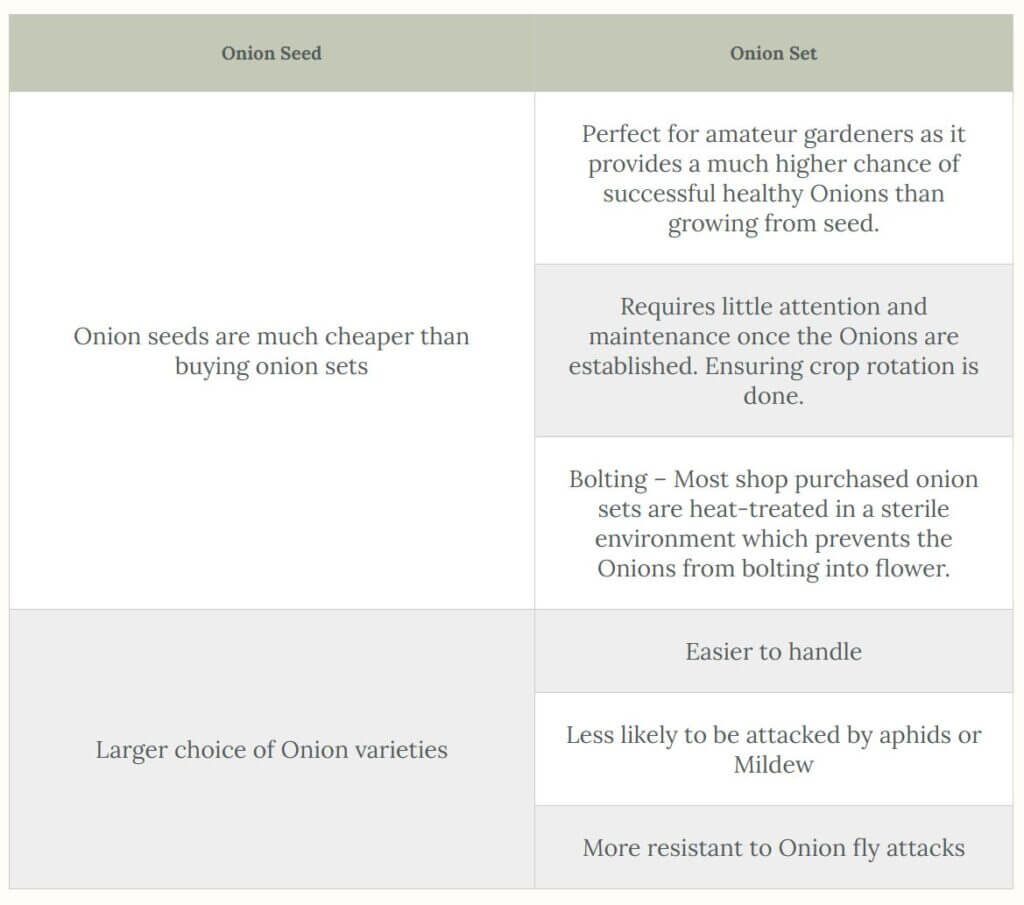
Onion Seed vs Onion Set
When growing Onions, the common question lies between growing from seed which on average takes from 6 to 12 months or from a bulb which takes around 5 to 6 months. We have listed below some benefits of choosing either growing your Onions from seed or sets.
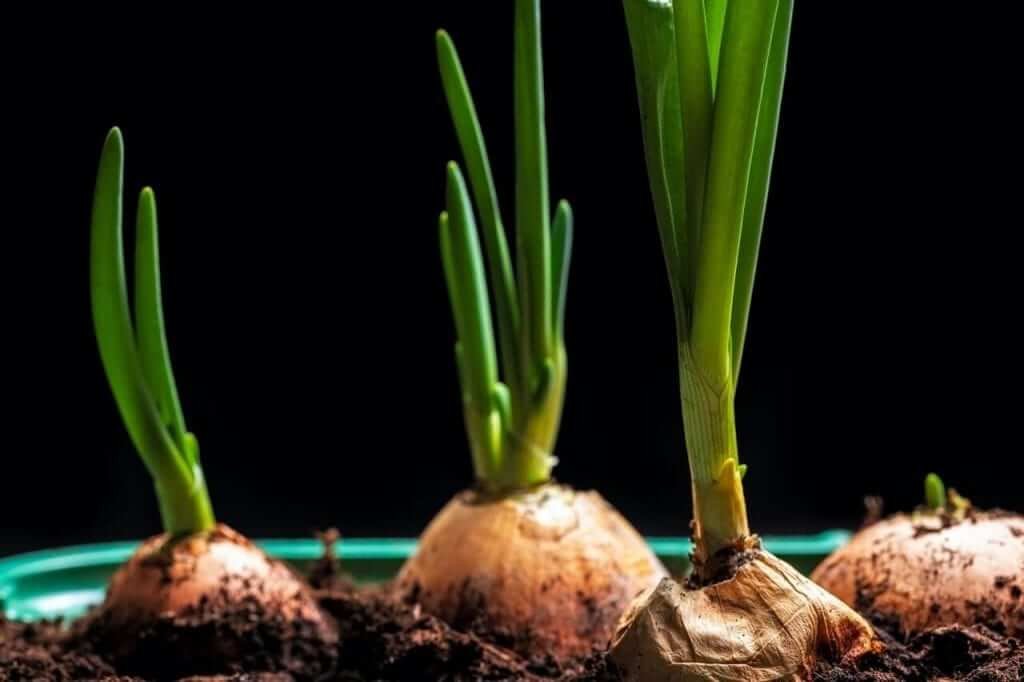
The Root to successful Onions
Onion roots reach a final length of 80cm and a width of around 30cm which is a surprise to most gardeners. The Onion roots are fragile and very thin. It is, therefore, essential to dig the ground as deeply as possible before sowing seed/set as it is very beneficial to onion crops root development.
- Ensure the root ball remains intact when you transplant a young onion plant, prevent damage to the roots.
- Thin onion seedlings as early as possible to minimise root damage.
- Remove weeds at the earliest stage possible to avoid damaging the roots of nearby onions. Weeding when the ground is damp has also been proven to reduce onion root damage.
- When onion roots are damaged by weeding or thinning, the ability to absorb moisture and nutrients reduces. Also, the onions stop growing when their roots are damaged—damaging the roots signals to the plants that they have reached maturity and the reason why they stop growing larger.
Watering your Onions – beware of droughts!
Onions should be watered well and regularly throughout the growing season to avoid any stunt in growth, which can result in bulges in the bulbs, in thick necks and thin bulbs, or in splitting. When the onions rise from the ground or are swollen stop watering
An onion grower is often at the mercy of the weather, any period of drought when the bulbs are forming can result in a very disappointing crop. Ensure that you keep watering regularly during a drought.
If the bulbs reach a point when they get dehydrated and growth stops, then a sudden drenching can be disastrous, causing distorted growth, split bulbs and thick necks. Key points to remember; pull the Onions as soon as growth has stopped and during droughts, water regularly.
Preparing the soil before Sowing
Onions need a firm, loamy soil, although good crops can grow on any suitably prepared ground. The land must be well-drained. Onions prefer a light soil.
Advanced – Onions prefer a soil acidity level of around pH6 by applications of lime at a rate based on the result of a soil test.
For the best results, dig manure or a good quality compost into the soil several months before sowing (e.g. in Autumn for beds where you will be sowing in Spring).
All types of onions need a firm, compact seedbed of fine soil. Rake the ground before Sowing and lightly tread/walk on the soil to firm it.
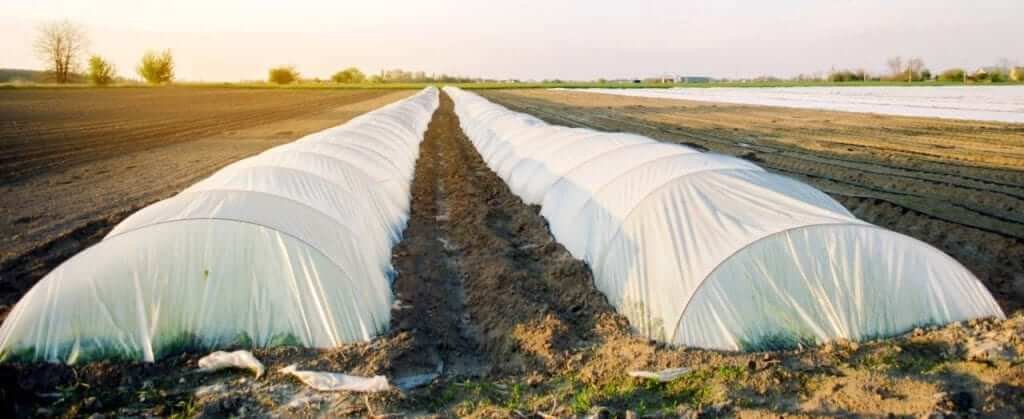
The benefit of Cloches and cold frames
Like most vegetables, an advantage can be gained in Spring by sowing under cloches. These sowings can be made up to eight weeks earlier than those in the open soil. The extra weeks are particularly useful with onions, as the plants need a long growing period so that bulbs sown under cloches tend to be larger. Remove cloches when all danger of frost is past.
You can also get a head start by sowing in late Winter in a cold frame. Sow as you would for growing under cloches and harden off for planting out in mid-spring.
Onions sown under cloches or in frames have two other advantages over later-sown crops. In the first place, they grow quickly and make much of their growth while the soil is still moist from the winter rains, thus avoiding a severe check at a critical stage during a summer drought. They are also sufficiently well grown to resist the attacks of the onion fly, which is active in late Spring and Summer.
Growing Onions from Seed
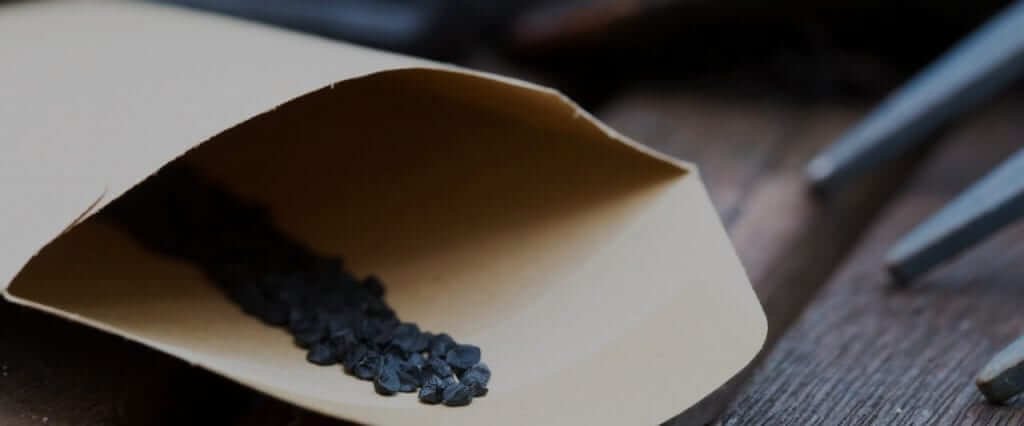
If you are sowing by seed, the average expected germination time is between 20 – 25 days. Providing that your seeds are stored in a cool and dry place, they can last for 1 – 5 years. Note that the longer store your seeds, the lower the success of germination.
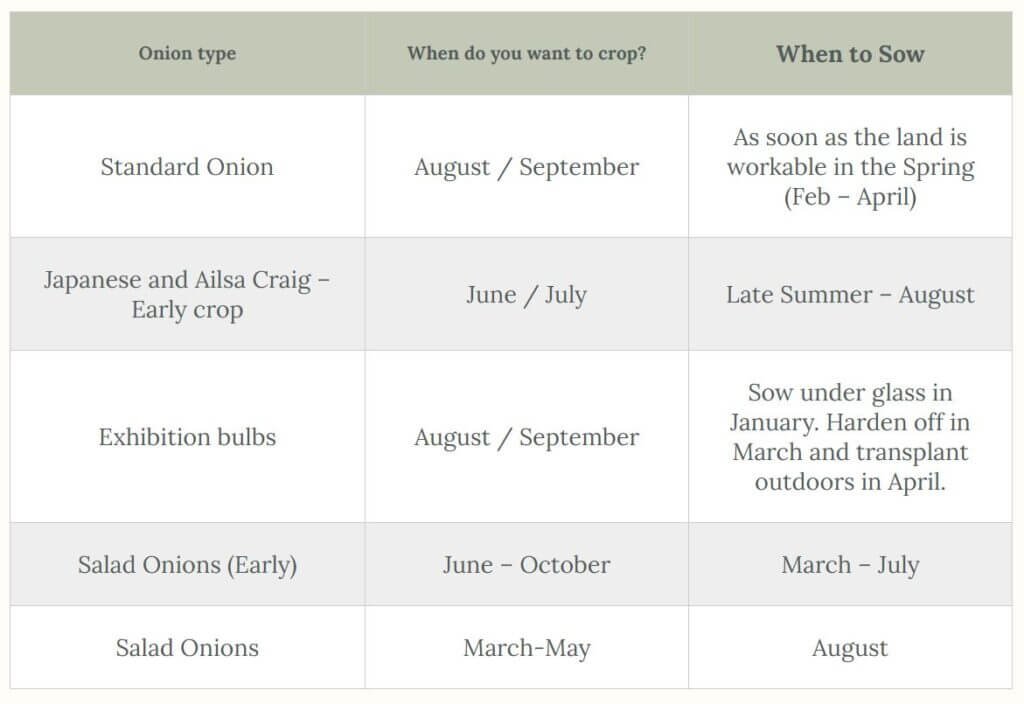
They can be grown in four different ways
Sown late Summer and are left over the winter months. They are thinned out during the mid-spring to be ready for harvesting during the next Summer.
When grown successfully, these varieties should fill the gap between using the last stored onions from the previous year’s spring sowing and the availability of the new crop next Autumn.
Sown outdoors during late Summer, thinned out in the Autumn. This method effectively provides the same results as Sowing in Spring under cloches. But autumn sowings are worthwhile only if your garden is relatively warm, and the site chosen should be quite sheltered.
The seed should be sown in early Autumn to give the plants enough time to attain a reasonable size—about 15 cm in height—before the onset of winter frosts. Onions are hardy but not entirely so, and a severe winter will cause damage.
It is essential to select the correct varieties, bred for autumn sowing. Onion plants bought from nurseries for transplanting in Spring should also be of the autumn varieties. The bulbs are then harvested and stored in late Summer.
Sown and germinate under glass in mid-winter then transplanted during the early Spring to a permanent planting bed and harvested during the Autumn.
Sow outdoors as early in Spring as soil conditions will permit. The soil should be moist but not wet; if the soil does not stick to your boots but still feels damp, then it is ready for Sowing.
Sow the seed in drills 1.5 cm deep and 30 – 45 cm apart, and sow fairly thickly—about 10-20 seeds per 30 cm row. The period from sowing to germination, on average, is 14- 21 days.
Thin the young plants in two stages the first to about 5 cm apart, and then to about 15 cm apart. These Onions will be ready for harvesting in early Autumn.
Although Onions require a limited amount of general maintenance, it is vital to care for them when they are growing. This is because onions produce tall, thin, hollow leaves, they are particularly susceptible to weed competition.
To tackle this, hoe the soil frequently but shallowly to avoid loosening the compact soil around the onion roots or damaging the bulbs. Hand-weeding, which does not damage the roots, will almost certainly be necessary.
A sedge peat mulch will help to control the weeds, but it should not cover the tops of the bulbs.
Should I sow onion seeds indoors or outside directly into the ground?
The two most common methods for sowing onion seeds are sowing undercover in pots (either in your home, in a shed or greenhouse) or sowing them directly outside into the ground. Sowing seeds indoors in pots is the most time-consuming but can result in larger onions which mature earlier.
How long can I keep Onion seeds?
Onion seeds are usable for approximately 2 – 4 years after you have purchased/harvested them. Be aware that the germination rate will deteriorate year by year. Onion seeds must be stored in a cool, dry and dark place.

How and when to sow Onion seeds into the ground
You will notice that individual onion seeds are tiny, so it is vital to ensure that the soil they are being grown in is correct. To do this, we advise the following:
- The soil needs to be dug to a fine texture so that the seeds are not overwhelmed by clods of earth.
- Repeat the digging of the top 30cm of the bed will help with drainage, allow good root growth and maintain moisture in the ground.
- Remove any large stones that you may come across.
- If the ground is comprised of heavy clay, deficient in nutrients or light and sandy add well-rotted compost as you can working it well into the soil.
- Additionally, sprinkle blood, fish and bone as you are digging into the soil evenly.
- Remember that Onions should not be grown in the same soil as a previous crop of the onion family.
- Draw a line in the soil about 2cm deep using a trowel
- Ensure the soil is damp. If not, lightly water the soil.
- Sow the seeds thinly (one seed for every 2-3cm)
- Gently move soil over the seeds to cover them
- Use a marker at the end of the bed to remind yourself of the Vegetable and variety
- Once the seedlings emerge which is usually within 3 – 4 weeks from when you sow your seeds, thin out the seedlings. The Onions ideally need to be 10cm apart.
How and when to sow Onion seeds in pots
When you sow onion seed indoors in pots, this will give you a head start on the growing season. This can also lead to a more abundant crop harvest in Autumn.
- Begin by sowing your onion seeds indoors during the first week of February into large pots.
- Fill the pots to 3cm from the top with multi-purpose compost then place 2 – 4 seeds, evenly spaced in each pot.
- Lightly sprinkle 1 – 2cm of compost to cover the seeds.
- Water the pots from below by placing them in a container of water.
- Place the pots in a warm place, the ideal germination temperature for onions is between 16°C – 26°C.
- The seeds should take between 6 – 16 days to appear depending on the temperature.
- As soon as the Onions appear, move the pots to a light and cool place indoors.
- If multiple seedlings appear in one area of the pot, pull out the weaker one as soon as possible, leaving just the strongest.
- As they continue to grow, keep the compost moist but do not overwater.
- When the temperature is suitable, place the plants outside to give them as much natural sunlight as possible.
- Prepare the planting bed in late March / early April.
- The soil needs to be dug to a fine texture so that the seeds are not overwhelmed by clods of earth.
- Repeat the digging of the top 30cm of the bed will help with drainage, allow good root growth and maintain moisture in the ground.
- Remove any large stones that you may come across.
- If the ground is comprised of heavy clay, deficient in nutrients or light and sandy add well-rotted compost as you can working it well into the soil.
- Additionally, sprinkle blood, fish and bone as you are digging into the soil evenly.
- Remember that Onions should not be grown in the same soil as a previous crop of the onion family.
- In mid-May, choose a dry day, ensuring the soil is damp. If not, lightly water the soil, moist soil will cause less damage to the roots of the transplants.
- Turn the plants out of their pots try to avoid disturbing the roots.
- Dig a small hole using a trowel and place the plant in the hole infilling with soil. It should be to the same depth as it was in the pot.
- Ensure that each plant is 10cm apart and rows should be 30cm apart to allow for hoeing weeds.
- Water well again.
General care for your Onions
If onions have too much nitrogen, it encourages foliage growth rather than growth in the bulb.
Scatter blood, fish and bone once a month around the plants and gently work into the soil not to damage the roots.
It’s known that Onions suffer if the soil becomes dry during the warm weather, this is because their root system isn’t designed to cope with drought. Therefore, water during any dry spells.
Weed frequently when the weeds are small to avoid damaging the roots of nearby onions.
When your onions are well-formed, stop watering and feeding. This will encourage the Onions to go into what is called the maturing stage, which helps to allow the onions to be stored for a long time.
Keep an eye out for pests and diseases which can be found by CLICKING HERE
Harvesting Onion Seeds
Onions are biennials which can be a problem in areas where the winter temperatures are low; you can never guarantee that onion plants will overwinter in the ground.
In light of this, the onion bulbs should be carefully dug out of the ground, kept cool until the Spring.
- During the Spring, re-plant the Onions when the soil has warmed.
- During the second year, flower heads will form and theses should be left until they start to turn brown.
- Cut the flower heads off and store them in a paper bag in cold, dry conditions for a month.
- Shake the dried-out flowers, and the black seeds will fall off.
- Store the seeds in marked bags in a cool, dry place until the following season.
For Onion harvesting, please refer to the section called Are my Onions ready for Harvesting?
Growing Onions from Sets
Many gardeners benefit from a head start by planting onion sets. These are small onion bulbs that have had their growth in the previous Autumn. Buy only certified sets from a reputable seed merchant.
An onion set is an onion which has not been allowed to grow to its full size. When onion sets are originally grown from seed, they are grown very close together, resulting in the onions growing very small due to them being crowded.
Plant all your onion sets together during Early April time. Use cloches as protection if you wish to plant slightly earlier.
Onion sets prefer well-dug soil which has been dug over a few months earlier that isn’t acidic and is well-drained. Ensure proper crop rotation from year to year to prevent disease. (Remember that does mean crop rotation of the entire onion family which are onions, leeks, garlic and spring onions) Onion sets also prefer a bed that is positioned in full sun / partial sun.
Every 10cm in a straight line, make a small hole in the soil with your finger and place an onion set into it, root first (ensure you don’t plant them upside down). Plant rows that are around 30cm apart to allow for weeding.
Place soil around the planted onion set so that just the top tassel of the onion appears above the soil surface. Work into the soil some bonemeal or blood fish and bone.
During the first weeks, the birds may become a problem so place netting over the bed, ensuring it is secured down. Remove the netting after four weeks.
General care for your Onions
The great news is that Onions require very minimal maintenance but ensure the following is done…
If onions have too much nitrogen, it encourages foliage growth rather than growth in the bulb. Scatter blood, fish and bone once a month around the plants and gently work into the soil not to damage the roots.
Examine the onion sets a week or two after planting, as they tend to rise out of the soil and may travel several centimetres from the place where they were planted. If this has happened, press the sets back into the soil. They may also be pulled out of the ground by birds.
It’s known that Onions suffer if the soil becomes dry during the warm weather, this is because their root system is not designed to cope with drought. Therefore, water during a dry spell.
Weed frequently when the weeds are small to avoid damaging the roots of nearby onions.
When your onions are well-formed, stop watering and feeding. This will encourage the Onions to go into what is called the maturing stage, which helps to allow the onions to be stored for a long time.
Keep an eye out for pests and diseases which can be found by CLICKING HERE
Japanese Onions / Autumn planting Onion sets
Some varieties of Onions are bred explicitly for planting in autumn months and are known as Autumn planted onion sets or Japanese onions.
Plant these onion sets between September and mid-October and they should be ready to harvest June the following year fully.
How to grow Onions for Exhibitions
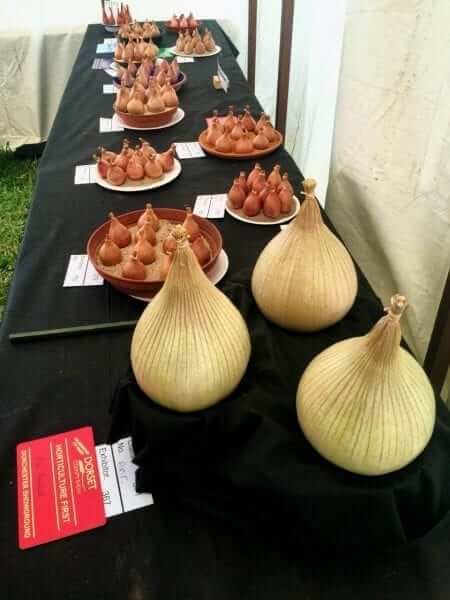
- Sow the seed in mid-winter in a greenhouse heated to 13°C, so that the bulbs will be fully ripe in time for the early autumn shows.
- Sow seeds 2.5 cm apart in 7.5 cm deep seed boxes filled to within 2.5 cm of the top. Use a light compost with a small amount of sharp sand added.
- Cover the seeds with no more than 0.5 cm of the compost and sand mixture and keep the light out by covering the boxes with glass and newspaper until the seed germinates.
- Remove the paper and prop up the glass.
- Remove the glass altogether after a few days and place the boxes near the light. Keep the compost quite moist.
- When the seedlings have four leaves, prick them off individually into 9 cm pots and move them to an unheated frame in early Spring. If necessary, support the plants with slender canes.
- During late to mid Spring, set out the plants into their permanent bed, spacing them 30 cm apart in rows 30 cm apart. Choose only those plants that have firm, green leaves and white, unbroken roots.
- Cultivate, as usual, giving more nitrogenous food and a light dressing of potash in mid-summer.
- Just before you are ready to lift the bulbs remove a little of the soil from around the neck, also any loose outer skin, so that the bulbs get plenty of Sun and develop the best possible colour.
- A few days before harvesting, loosen the roots by partly lifting the bulbs carefully with a fork.
- After harvesting, when the necks should be limp, place the bulbs in a slightly shaded part of the greenhouse or a sunny room to ripen.
- Your Onions are now ready for exhibition… Good luck
Are my Onions ready for harvesting?
When the bulbs are ripening, indicated by the yellowing and dying back of the leaves, discontinue any watering or feeding.
In dry weather the leaves will bend over naturally but, if the Summer is wet and this has not happened, bend over the tops to expose the neck of each bulb to the Sun, to hasten the ripening process.
It may take five weeks for large bulbs to ripen.
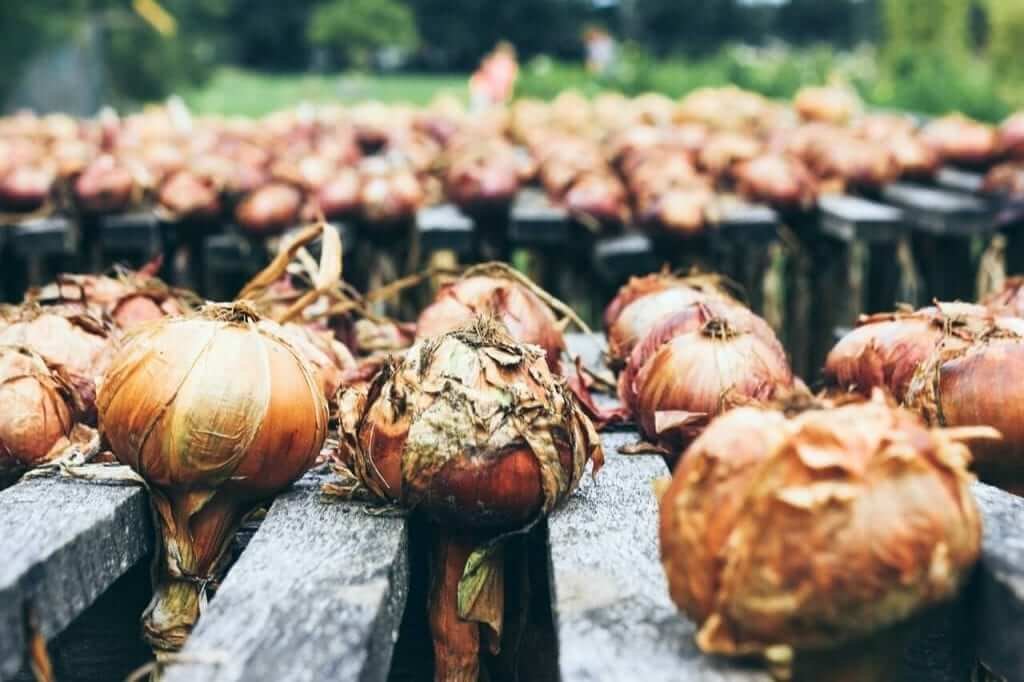
Harvesting your Onions (from Seed or Sets)
Harvesting can begin from the end of June; however; you can wait for until August depending on the time the seeds are sown.
You will often find that the earliest is the Japanese varieties which should mature around midsummer. Japanese onions are for immediate use; most other varieties can be used at once or can be stored. Very large onions do not store as well or as long as smaller bulbs, so use the large ones first. Salad varieties are often harvested when bulbs are around ½ inch to 1 inch across. The harvesting season is typically March – October.
The first signs of when onions are starting to ripen are when the foliage and stems start yellowing and die off.
If you wish to use the Onions immediately, the drying process isn’t necessary, simply pull up carefully, clean and use.
Once you notice the foliage is dying and going yellow, leave for around two weeks and then carefully lift using a fork, trowel or by hand.
Try to choose a period of dry, sunny weather for 2-4 days to allow the Onions to dry out. Turn them now and again to ensure even ripening.
The onions are ready for storing when they are thoroughly dry with brittle, papery leaves.
There are three popular methods for drying your Onions –
- Dry on top of the soil in the Sun. After the 2-4 days have passed, move any loose soil and lightly trim off some of the top foliage but not all of it.
- Spread the Onions on a drying rack/sack or trays outside over a sunny period.
- If the weather is wet, dry indoors on a drying rack/sack or trays.
During the drying process do not bend the foliage leaves as this can cause neck rot. Avoid bruising the bulb during the harvesting process. Depending on the size of the bulb and the drying temperature, the drying process will take between 1 to 3 weeks.
Check the bulbs for any damage, thick-necked, soft or spotted and prioritise to use them up first. The remaining can be stored. Note that the Japanese varieties are not suitable for long term storage.
Store the onions in a dry, cool place and use them as and when required. See How to Store Onions section for more details
Are there any other jobs after harvesting?
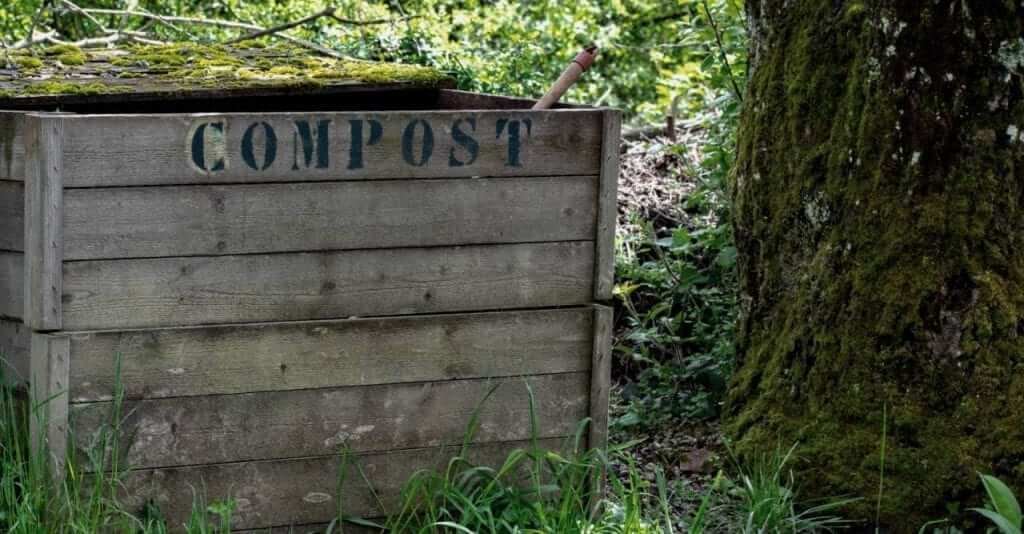
The onion is among the most economical of plants in its production of foliage. By the time the bulb has ripened, there is minimal left of other parts of the plant. Place any disease-free dead leaves to the compost heap; otherwise, burn them.
What is the difference between Onions and Shallots?
Onions and shallots are planted and grown in the same way: –
- Shallots are smaller versions of onions.
- Shallots are used for flavouring or pickling rather than used as a vegetable
- Shallots have a milder flavour compared to onions.
- Shallots are grown in clumps whereas Onions produce only one bulb.
How to store Onions
Bulb onions are generally grown for storing and use in Autumn and Winter. Onions in-store will start to produce green shoots and, if allowed to, flower- heads in the following Spring, so only keep them for a limited time and check them for signs of decay or growth.
Bulbs for storing should be perfectly healthy and quite dry. Use up any that are not as these won’t be suitable for storing.
Methods for storing Onions
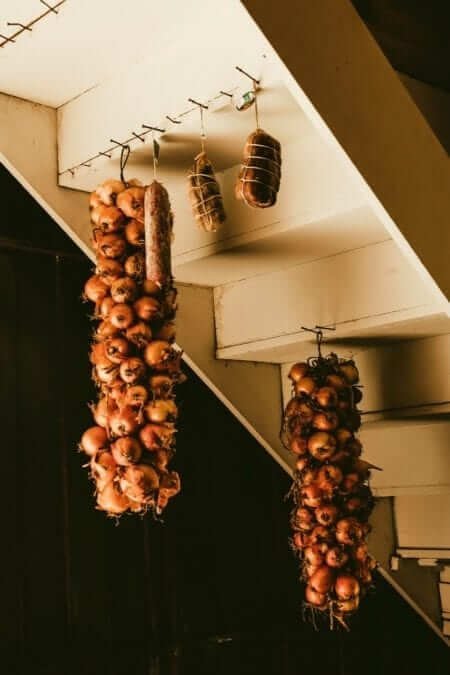
Onions should be stored in a cool and well-lit room such as a pantry or garage and can be stored until the Spring. It is essential that where you store your Onions over the Winter, it must be dry, airy and frost-proof. There are multiple ways of storing your Onions over the Winter months…
- In trays of wire netting
- Tied using rope/string – tie each bulb to a length of rope suspended from the roof of a shed or outhouse, arranging them spirally around the rope
- Tights – Suspend into the air by hanging them up ensuring that air is circulating all ground the bulbs
- Netting bags
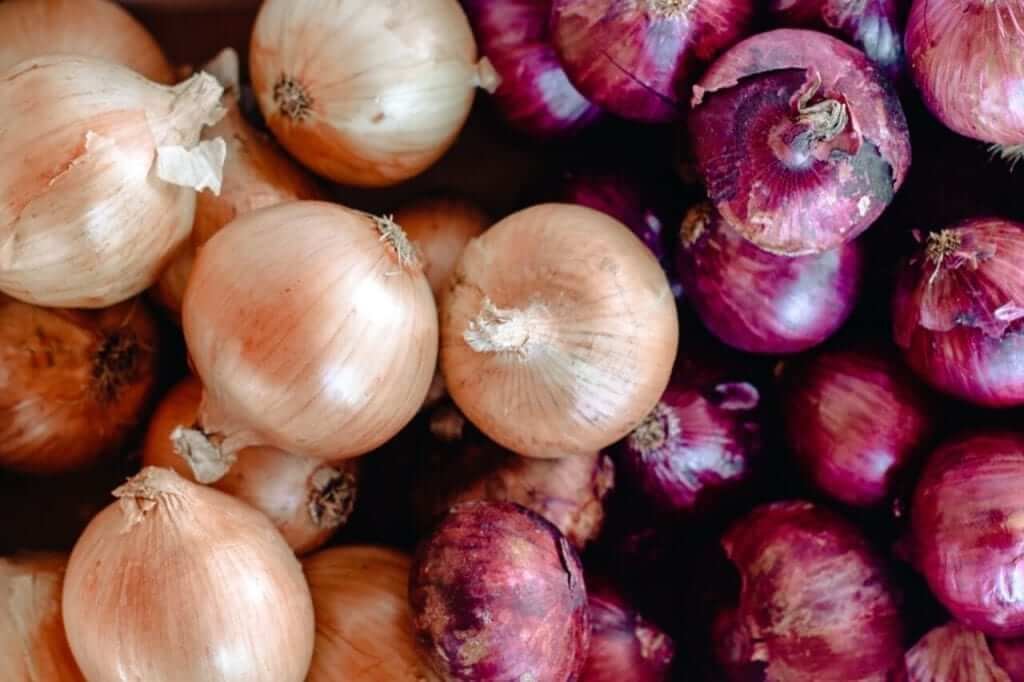
Onion Varieties
This is a guide to the basic characteristics of some of the most popular varieties of onion. Your local garden centre will probably feature a selection of these which are most likely to suit the climate and soil in your area.
Other key points to remember are whether you want a strong or mild flavour, and for how long you will want to store your crop of onions.
Ailsa Craig
This is an old favourite and one of the best for large golden-brown bulbs. They have flattish bulbs that have a mild flavour and are very long- keeping and not prone to bolt.
Bedfordshire Champion
A very reliable and provide an abundant crop yield. They are well-flavoured and have the benefit of long- keeping bulbs.
Giant Zittau
Providing a semi-flat, medium-sized brown-skinned onion. They are also long- keeping onions.
Rijnsburger
Originate from a group of several hybrids. They are all reliable for a large crop yield which produces large and long-keeping bulbs.
Hygro
A relatively new variety and an F1 hybrid. Produces uniform sized bulbs with pale skin and white flesh. Very good for storage.
White Spanish
Very large, flat bulbs; will keep for a very long time. Mammoth Red: very large, sweet bulbs; red-skinned, suitable for colder climates.
Ailsa Craig
This is an old favourite and one of the best for large golden-brown bulbs. They have flattish bulbs that have a mild flavour and are very long- keeping and not prone to bolt.
North-Holland blood red
A red-skinned Onion and attractive choice for an exhibition.
Autumn Queen
A flattish bulb that is for Autumn sowing and is a popular choice for exhibitions.
Ailsa Craig
This is an old favourite and one of the best for large golden-brown bulbs. They have flattish bulbs that have a mild flavour and are very long- keeping and not prone to bolt.
Giant Rocca
There are two types—brown-skinned and yellow-skinned. They are known for their flattish globe onions. The disadvantage is that they do not store well.
Red Italian
A medium-sized flat red-skinned onion.
North-Holland blood red
A red-skinned Onion and attractive choice for an exhibition.
Big Ben
These are large onions with a semi-flat shape that are non-bolting. They have golden skin and store well.
Autumn Queen
A flattish bulb that is for Autumn sowing and is a popular choice for exhibitions.
Reliance
One of the best standard varieties that are typically sown in Autumn. Flat bulbs are large and store well.
Express Yellow
This is the earliest of the Japanese types. They have flattish bulbs with golden-brown skin that you can crop in early Summer.
Katcukj, Kaituka Extra Early I
These onions are ideal for Sowing in the late Summer to crop during the midsummer the following year. They are straw-coloured flat onions.
Senshyu
These are known to have the most substantial crop yield of all the Japanese varieties. Sow in the early Autumn. These are straw-coloured semi-globe-shaped onions.
Presto
These are of Swiss origin but very similar to the Japanese varieties and treated as one. Sow in late Summer for onions the following mid-summer. These have semi-globe bulbs with a good quality flavour.
Imai yellow
An early globe-shaped Japanese Onion variety.
Senshyu
Similar to the Imai yellow but slightly flatter and harvests later.
Stuttgarur Giant
These are suitable for all regions, mainly where seeds are challenging to grow. They are resistant to bolting and are very long-keeping.
Sturm Autumn Gold
These are large, robust onions. They are resistant to bolting and are very long-keeping.
Rijnsburger Wijbo (Giant Fen Globe)
Known to be one of the best varieties as they are specially treated to stop bolting. They are very early globe-shaped onions with golden skin with a mild flavour.
Salad onions and spring onions, also known as scallions, can be sown in Autumn, Spring or Summer, for pulling when young and green to be used raw in salads. Spring onions are sown in the same soil and conditions as for the maincrop.
White Lisbon
These quick growing spring onions are the most common variety of the spring onions family.
White Lisbon Winter Hardy
This variety is specifically for sowing in the early Autumn to give the earliest spring onions. These spring onions are very hardy.
Ishiko Straight Leaf
These spring onions are for spring and autumn sowing. The leaves are straight and green to the tip; they have an added benefit of being winter-hardy.
Ishikura
Known as the bunching onion. They don’t produce bulbs, and you can pull out what you need leaving the rest until you require them for a fresh salad.
Sown in April and harvested in July / August. No need to be thinned out or be given feed. Pickling onions prefer a light, thin soil. Quick growing and mature in around 12 weeks.
Paris Silver-skin
These are small silver-skinned onions that are quick-growing and ripen early. Sown in Spring and harvested in Summer
Cocktail
One-inch bulbs which mature rapidly; well-flavoured pickling type. Pick when they are approximately the size of a marble
Barletta
Another popular variety for cocktail onions.

Pests, Diseases & Problems
Below is an in-depth look into most of the pests and diseases you are likely to find while you are growing and storing your onions.
| Whats the issue? | Most Likely causes |
| Seedings have fallen over… | Dampening off |
| Seedlings have been killed… | Eelworm |
| Seedlings have been eaten… | Cutworm |
| Onion sets have lifted out of the ground | Maybe due to birds or hard frost |
| Onion sets have produced two or more plants | Set Division |
| The leaves have been tunnelled… | Leek Moth |
| The leaves have been eaten above ground level… | Cutworm or Wireworm |
| The leaves have been eaten at ground level… | Cabbage Moth |
| The leaves have been diseased… | Smut, Rush Downy Mildew |
| The leaves are yellow and drooping… | Onion fly, White rot, shanking |
| the leaves are green and drooping… | Drooping Leaves |
| The leaves are white tipped… | Whitetip |
| The leaves are swollen and distorted… | Eelworm (Stem and Bulb) |
| The plants are abnormally large necked… | Thick neck |
| The plants have run to seed… | Bolting |
| The bulbs are tunnelled, and I can see maggots… | Onion fly, White rot, shanking |
| The bulbs have split at the base… | Saddleback |
| The bulbs have black spots/smudges on them… | Smudge |
| The bulbs are mouldy at the base… | White Rot |
| The bulbs are soft but don’t smell… | Stem and Bulbs eelworm, Downy Mildew or White rot |
| The bulbs are soft and smell awful… | Shanking |
| When I store the bulbs, they are soft and mouldy near the neck… | Neck rot |
| When I store the bulbs, they are soft and smell awful… | Soft rot |


